tencent cloud

DokumentasiTencent Effect SDK

Flutter

Download
Mode fokus
Ukuran font
Terakhir diperbarui: 2026-07-17 17:56:15
Diterjemahkan oleh AI
Beauty Flutter SDK requires dependence on the Beauty SDK of the Android/iOS end. Through the Plugins provided by Flutter, the native end features can be exposed to the Flutter client. Therefore, when integrating the beauty filter features, you need to manually integrate the SDK of the native end.

Running Demo

Download the demo project, modify the demo/lib under the main.dart file, add your licenseUrl and licenseKey in this file. The sample code for using beauty features in TRTC is primarily located in demo/lib/page/trtc_page.dart and demo/lib/main.dart.
Android
iOS
1. In demo/app, find the build.gradle file, open the file, and change the value of applicationId to the package name you used when applying for the license.
2. In demo/lib, execute flutter pub get.
3. Use Android Studio to open the demo project and run it.
1. In the demo directory, execute flutter pub get.
2. In the demo/ios directory, execute pod install.
3. Use Xcode to open Runner.xcworkspace.
4. Change the project's bundle ID (it needs to be the same as the bundle ID you provided when applying for the license).

SDK Integration

Flutter Integration:

Method 1:

Remote Dependency: Add the following reference in the pubspec.yaml file of your project:
tencent_effect_flutter:
git:
url: https://github.com/Tencent-RTC/TencentEffect_Flutter

Method 2:

Local dependencies: Download the latest version of tencent_effect_flutter from tencent_effect_flutter, then add the folders android, ios, lib, and the files pubspec.yaml and tencent_effect_flutter.iml to your project directory. Next, include the following reference in your project's pubspec.yaml file: (Refer to the demo for guidance.)
tencent_effect_flutter:
path: ../
Execute the following command:
flutter pub get

Method 3:

Execute the following command:
flutter pub add tencent_effect_flutter

Native Platform Integration

Android
iOS
1. Changing the Package (The default package integrated in `tencent_effect_flutter` is S1-07. If your package differs, you can change it using the method below.)
2. Add Test Material
Navigate to the src/main/assets folder within the android/app module of your project. Copy the lut and MotionRes directories from the demo project's demo/android/app/src/main/assets into the corresponding android/app/src/main/assets directory of your own project. If the assets folder does not exist in your project, you may create it manually.
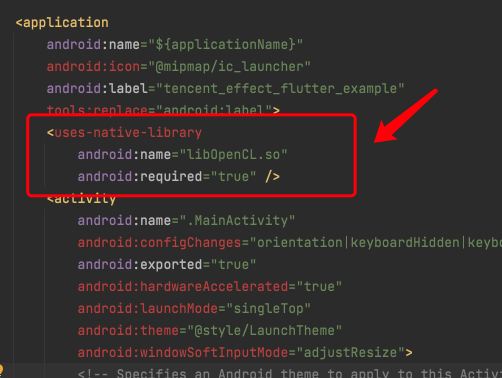
3. Navigate to the AndroidManifest.xml file within the app module, and add the following tag inside the application section:
<uses-native-library
android:name="libOpenCL.so"
android:required="false" />
//true means libOpenCL is required for the current app. Without this library, the system won't allow the app to be installed.
//false means libOpenCL is not required for the current app. The app can be installed normally whether this library exists or not. If the device has this library, GAN-type effects in the beauty effects SDK will work properly (like Fairy Face, Comic Face). If the device doesn't have this library, GAN effects won't work, but it won't affect other features in the SDK.
//For more info about uses-native-library, check out the official Android documentation: https://developer.android.com/guide/topics/manifest/uses-native-library-element
After addition, the result is as shown in the following image:


4. Obfuscation Configuration
When building a release package, if compilation optimization is enabled (by setting minifyEnabled to true), certain code that is not invoked at the Java layer may be removed. However, this code could potentially be called by the native layer, leading to exceptions such as no xxx method.
If you enable such compilation optimizations, you must add these keep rules to prevent the xmagic code from being stripped.
-keep class com.tencent.xmagic.** { *;}
-keep class org.light.** { *;}
-keep class org.libpag.** { *;}
-keep class org.extra.** { *;}
-keep class com.gyailib.**{ *;}
-keep class com.tencent.cloud.iai.lib.** { *;}
-keep class com.tencent.beacon.** { *;}
-keep class com.tencent.qimei.** { *;}
-keep class androidx.exifinterface.** { *;}
-keep class com.tencent.effect.** { *;}
1. Changing Plans (The default plan integrated in tencent_effect_flutter is S1-07. If this does not match your plan, you can change it using the method below.)
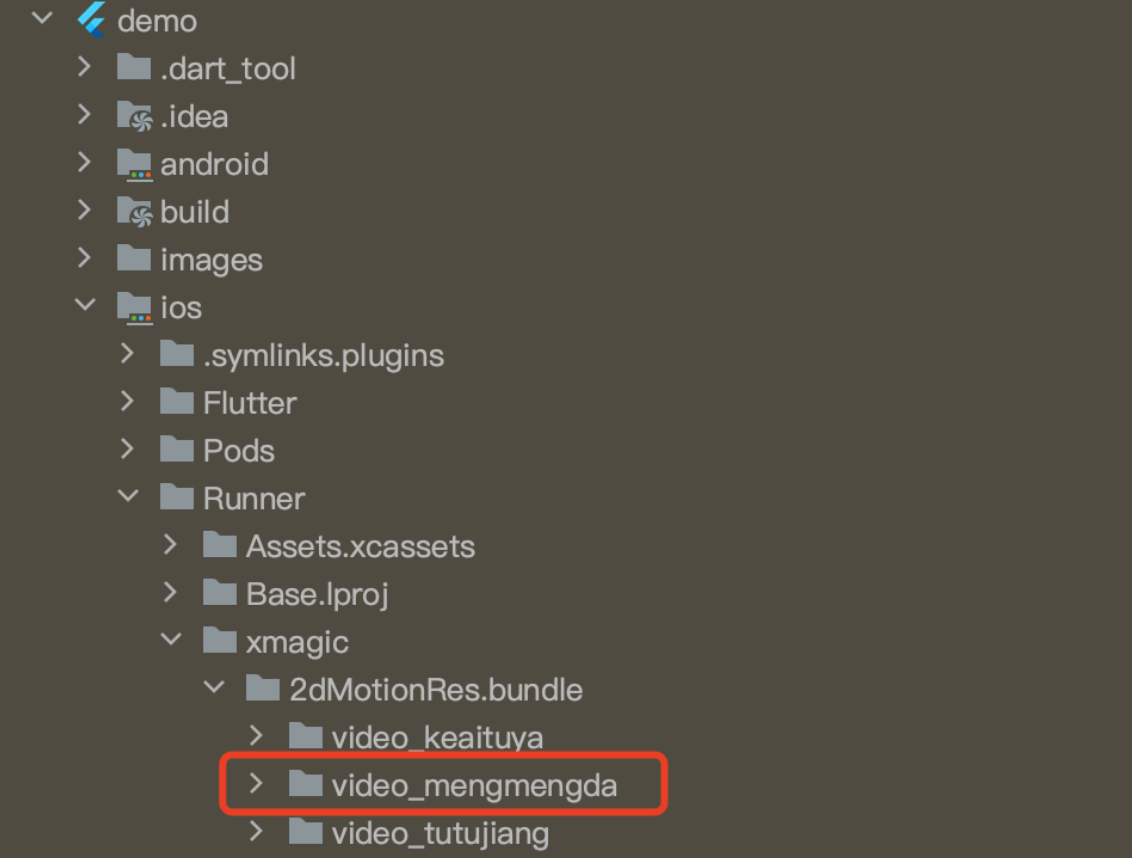
2. Add Test Material
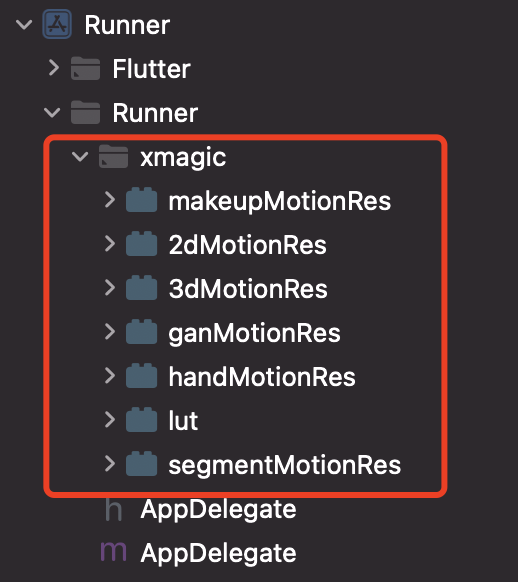
Copy the xmagic folder from the ios/Runner directory in the demo project to the ios/Runner directory in your own project. After adding it, the structure should appear as shown in the following image:


Note:
The materials copied from the demo project are test materials. For official materials, please contact our staff after purchasing a package to obtain them and re-add them accordingly.
Adding materials to an iOS project requires operations in Xcode. Manually import them via Add Files to “Runner” and verify successful inclusion in Build Phase — Copy Bundle Resources.

SDK usage

1. Associated with RTC

Associated with tencent_rtc_sdk
Associated with tencent_trtc_cloud
Android
iOS
Add the following code to the `onCreate` method of `FlutterActivity`:
Java
Kotlin
TRTCPlugin.setBeautyProcesserFactory(new XmagicProcesserFactory());
TRTCPlugin.setBeautyProcesserFactory(XmagicProcesserFactory())
As follows:
Java
Kotlin
import android.os.Bundle;
import androidx.annotation.Nullable;
import com.tencent.trtcplugin.TRTCPlugin;
import com.tencent.effect.tencent_effect_flutter.XmagicProcesserFactory;
import io.flutter.embedding.android.FlutterActivity;

public class MainActivity extends FlutterActivity {

@Override
protected void onCreate(@Nullable Bundle savedInstanceState) {
super.onCreate(savedInstanceState);
TRTCPlugin.setBeautyProcesserFactory(new XmagicProcesserFactory());
}
}
import android.os.Bundle
import android.os.PersistableBundle
import com.tencent.trtcplugin.TRTCPlugin
import io.flutter.embedding.android.FlutterActivity
import com.tencent.effect.tencent_effect_flutter.XmagicProcesserFactory

class MainActivity: FlutterActivity() {

override fun onCreate(savedInstanceState: Bundle?) {
super.onCreate(savedInstanceState)
TRTCPlugin.setBeautyProcesserFactory(XmagicProcesserFactory())
}
}
Add the following code snippet to the `didFinishLaunchingWithOptions` method within the AppDelegate file located in the ios/Runner directory:
Swift
Object-C
let instance = XmagicProcesserFactory()
TencentRTCCloud.setBeautyProcesserFactory(factory: instance)
XmagicProcesserFactory *instance = [[XmagicProcesserFactory alloc] init];
[TencentRTCCloud setBeautyProcesserFactoryWithFactory:instance];
As follows:
Swift
Object-C
import UIKit
import Flutter
import tencent_rtc_sdk
import tencent_effect_flutter

@UIApplicationMain
@objc class AppDelegate: FlutterAppDelegate {
override func application(
_ application: UIApplication,
didFinishLaunchingWithOptions launchOptions: [UIApplication.LaunchOptionsKey: Any]?
) -> Bool {
GeneratedPluginRegistrant.register(with: self)
let instance = XmagicProcesserFactory()
TencentRTCCloud.setBeautyProcesserFactory(factory: instance)
return super.application(application, didFinishLaunchingWithOptions: launchOptions)
}
}

#import "AppDelegate.h"
#import "GeneratedPluginRegistrant.h"
@import tencent_effect_flutter;
@import tencent_rtc_sdk;
@implementation AppDelegate


- (BOOL)application:(UIApplication *)application
didFinishLaunchingWithOptions:(NSDictionary *)launchOptions {
[GeneratedPluginRegistrant registerWithRegistry:self];
XmagicProcesserFactory *instance = [[XmagicProcesserFactory alloc] init];
[TencentRTCCloud setBeautyProcesserFactoryWithFactory:instance];
return [super application:application didFinishLaunchingWithOptions:launchOptions];
}

@end

Android
iOS
In the onCreate method of the application class (or the onCreate method of FlutterActivity), add the following code:
import android.os.Bundle;
import androidx.annotation.Nullable;
import com.tencent.effect.tencent_effect_flutter.XmagicProcesserFactory;
import io.flutter.embedding.android.FlutterActivity;
import com.tencent.trtcplugin.TRTCCloudPlugin;

public class MainActivity extends FlutterActivity {

@Override
protected void onCreate(@Nullable Bundle savedInstanceState) {
super.onCreate(savedInstanceState);
TRTCCloudPlugin.register(new XmagicProcesserFactory());
}
}
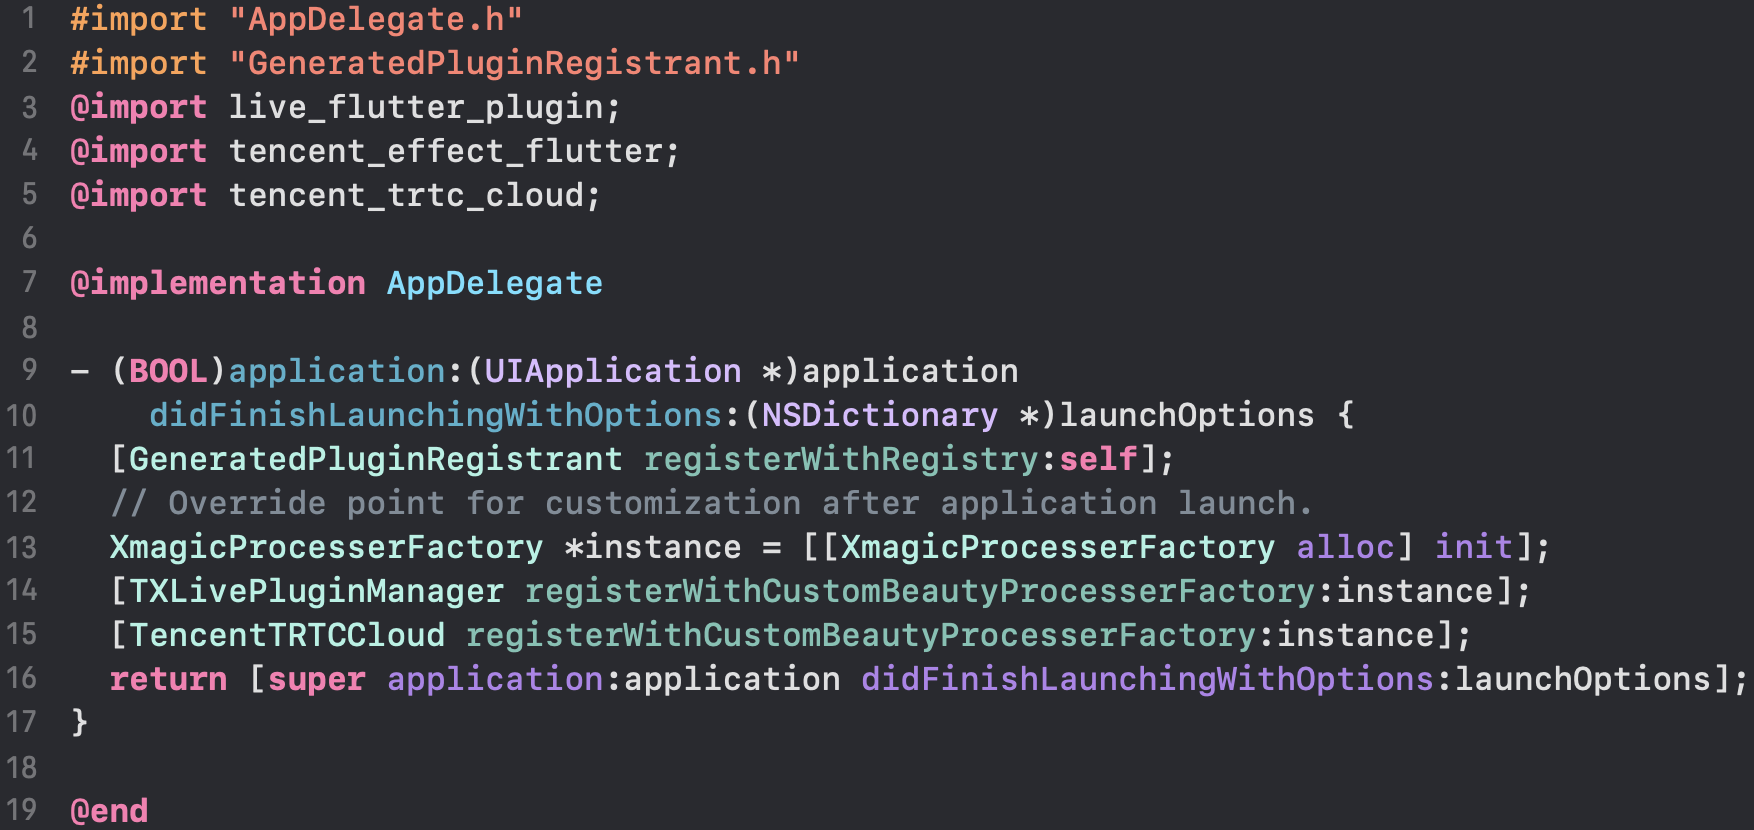
Add the following code within the didFinishLaunchingWithOptions method of your application's AppDelegate class:
#import "AppDelegate.h"
#import "GeneratedPluginRegistrant.h"
@import tencent_effect_flutter;
@import tencent_trtc_cloud;
@implementation AppDelegate

- (BOOL)application:(UIApplication *)application
didFinishLaunchingWithOptions:(NSDictionary *)launchOptions {
[GeneratedPluginRegistrant registerWithRegistry:self];
XmagicProcesserFactory *instance = [[XmagicProcesserFactory alloc] init];
[TencentTRTCCloud registerWithCustomBeautyProcesserFactory:instance];
return [super application:application didFinishLaunchingWithOptions:launchOptions];
}

@end


2. Call the resource initialization API

v0.3.5.0 and later
Before v0.3.1.1
void _initSettings(InitXmagicCallBack callBack) async {
String resourceDir = await ResPathManager.getResManager().getResPath();
TXLog.printlog('$TAG method is _initResource ,xmagic resource dir is $resourceDir');
TencentEffectApi.getApi()?.setResourcePath(resourceDir);
/// Resource copying only needs to be done once. In the current version, if copied successfully once, there is no need to copy the resources again.
/// Copying the resource only needs to be done once. Once it has been successfully copied in the current version, there is no need to copy it again in future versions.
if (await isCopiedRes()) {
callBack.call(true);
return;
} else {
_copyRes(callBack);
}
}


void _copyRes(InitXmagicCallBack callBack) {
_showDialog(context);
TencentEffectApi.getApi()?.initXmagic((result) {
if (result) {
saveResCopied();
}
_dismissDialog(context);
callBack.call(result);
if (!result) {
Fluttertoast.showToast(msg: "initialization failed");
}
});
}
String dir = await BeautyDataManager.getInstance().getResDir();
TXLog.printlog('The file path: $dir');
TencentEffectApi.getApi()?.initXmagic(dir,(reslut) {
_isInitResource = reslut;
callBack.call(reslut);
if (!reslut) {
Fluttertoast.showToast(msg: "Failed to initialize the resources");
}
});

3. Perform beauty authorization

TencentEffectApi.getApi()?.setLicense(licenseKey, licenseUrl,
(errorCode, msg) {
TXLog.printlog("Print the authentication result errorCode = $errorCode msg = $msg");
if (errorCode == 0) {
// Authentication succeeded
}
});

4. Enable/Disable Beauty Filter

Note:
The beautification feature must be enabled after the camera is activated and disabled before the camera is turned off. Enabling and disabling the feature should always be used in pairs.
tencent_rtc_sdk
tencent_trtc_cloud
///Enable beauty mode
/// Set to true to enable beauty mode, set to false to disable beauty mode
_enableCustomBeautyByNative(bool open) {
TencentEffectApi.getApi()?.enableBeauty(open);
}
///Enable beauty mode
/// Set to true to enable beauty mode, set to false to disable beauty mode
var enableCustomVideo = await trtcCloud.enableCustomVideoProcess(open);

5. Set Beauty Attributes

v0.3.5.0 and later
Before v0.3.1.1
For specific beauty attributes, refer to Beauty Attributes Table.
TencentEffectApi.getApi()?.setEffect(sdkParam.effectName!,sdkParam.effectValue, sdkParam.resourcePath, sdkParam.extraInfo)
TencentEffectApi.getApi()?.updateProperty(_xmagicProperty!);
/// You can call `BeautyDataManager.getInstance().getAllPannelData()` to get all the properties and call `updateProperty` to set properties.

6. Set other properties

Pause Beauty Sound Effects
TencentEffectApi.getApi()?.onPause();
Resume Beauty Sound Effects
TencentEffectApi.getApi()?.onResume();
Monitor Beauty Events
TencentEffectApi.getApi()
?.setOnCreateXmagicApiErrorListener((errorMsg, code) {
TXLog.printlog("Error creating an effect object errorMsg = $errorMsg , code = $code");
}); /// Needs to be set before creating the beauty filter
Set Callback for Face, Gesture, and Body Detection Status
TencentEffectApi.getApi()?.setAIDataListener(XmagicAIDataListenerImp());
Set Callback Function for Dynamic Prompt Messages
TencentEffectApi.getApi()?.setTipsListener(XmagicTipsListenerImp());
Configure the Callback of Facial Keypoints and Other Data (only available in S1-05 and S1-06)
TencentEffectApi.getApi()?.setYTDataListener((data) {
TXLog.printlog("setYTDataListener $data");
});
Remove All Callbacks. You need to remove all callbacks when terminating the page:
TencentEffectApi.getApi()?.setOnCreateXmagicApiErrorListener(null);
TencentEffectApi.getApi()?.setAIDataListener(null);
TencentEffectApi.getApi()?.setYTDataListener(null);
TencentEffectApi.getApi()?.setTipsListener(null);
Note
For more information on the APIs, see API Documentation. For others, refer to the Demo Project.

7. Adding a Beauty Filter Panel

The Beauty SDK provides a default UI panel out of the box, which can be directly integrated into your code. For detailed implementation, please refer to the demo. Below are the simplified steps:

7.1 JSON Configuration for the Settings Panel

void initPanelViewConfig() {
String panelDir = "assets/beauty_panel/";
String jsonFileSuffix =".json";
TEResConfig.getConfig().defaultPanelDataList.clear();

// Here’s an example of multilingual adaptation. It checks the current language environment and loads the corresponding language JSON file. By default, the panel’s JSON only supports Simplified Chinese and English. If we want to support Traditional Chinese, here’s how we can do it:
// Create a folder named zt_hant under beauty_panel, then copy the existing JSON files into this folder, and change the disPlayName values to Traditional Chinese. When needed, just load this JSON file.
// Note: This only adapts the panel JSON files for multiple languages. For text used in the library, you can check demo/lib/languages/TEPanelLocalizationsZhTW.dart.
// For multilingual implementation, see: tencent-effect-flutter/docs/MULTI_LANGUAGE_GUIDE_.md

// Check if the current device language environment is Traditional Chinese
Locale currentLocale = PlatformDispatcher.instance.locale;
bool isTraditionalChinese = currentLocale.languageCode == 'zh' &&
(currentLocale.countryCode == 'TW' ||
currentLocale.countryCode == 'HK' ||
currentLocale.countryCode == 'MO' ||
currentLocale.scriptCode == 'Hant');
if (isTraditionalChinese) {
panelDir = "assets/beauty_panel/zh_hant/";
jsonFileSuffix = "_zh_hant.json";
}

TEResConfig.getConfig()
..setBeautyTemplateRes("${panelDir}beauty_template${jsonFileSuffix}")
..setBeautyRes("${panelDir}beauty${jsonFileSuffix}")
..setBeautyRes("${panelDir}beauty_image${jsonFileSuffix}")
..setBeautyRes("${panelDir}beauty_makeup${jsonFileSuffix}")
..setBeautyRes("${panelDir}beauty_shape${jsonFileSuffix}")
..setBeautyBodyRes("${panelDir}beauty_body${jsonFileSuffix}")
..setLutRes("${panelDir}lut${jsonFileSuffix}")
..setLightMakeupRes("${panelDir}light_makeup${jsonFileSuffix}")
..setMakeUpRes("${panelDir}makeup${jsonFileSuffix}")
..setMotionRes("${panelDir}motion_2d${jsonFileSuffix}")
..setMotionRes("${panelDir}motion_3d${jsonFileSuffix}")
..setMotionRes("${panelDir}motion_gesture${jsonFileSuffix}")
..setSegmentationRes("${panelDir}segmentation${jsonFileSuffix}");
}

7.2 Adding Panel Code TEBeautyPanelView

Expanded(
child: TEBeautyPanelView(
beautyPanelViewCallBack,
null,
beautyPanelViewCallBack.panelController,
),
)

8. Configuring the Beauty Panel

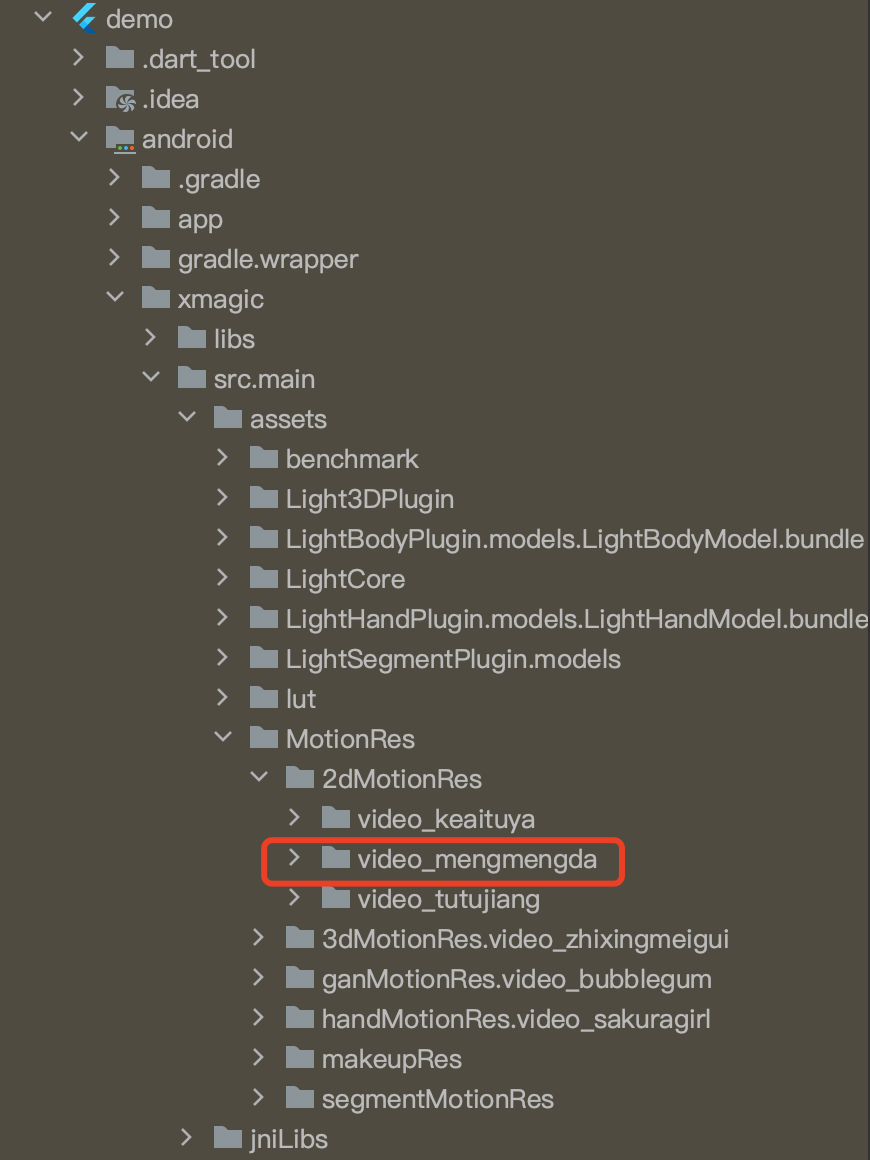
The panel attributes are configured via a JSON file, with the file location illustrated in the following diagram. Please refer to JSON File Description.


Bantuan dan Dukungan

Apakah halaman ini membantu?

masukan