Model Repository supports importing models. The list page manages different models and their versions. The import window allows you to import models directly through task-based modeling and upload models from Cloud Object Storage (COS).
Model Repository Lists
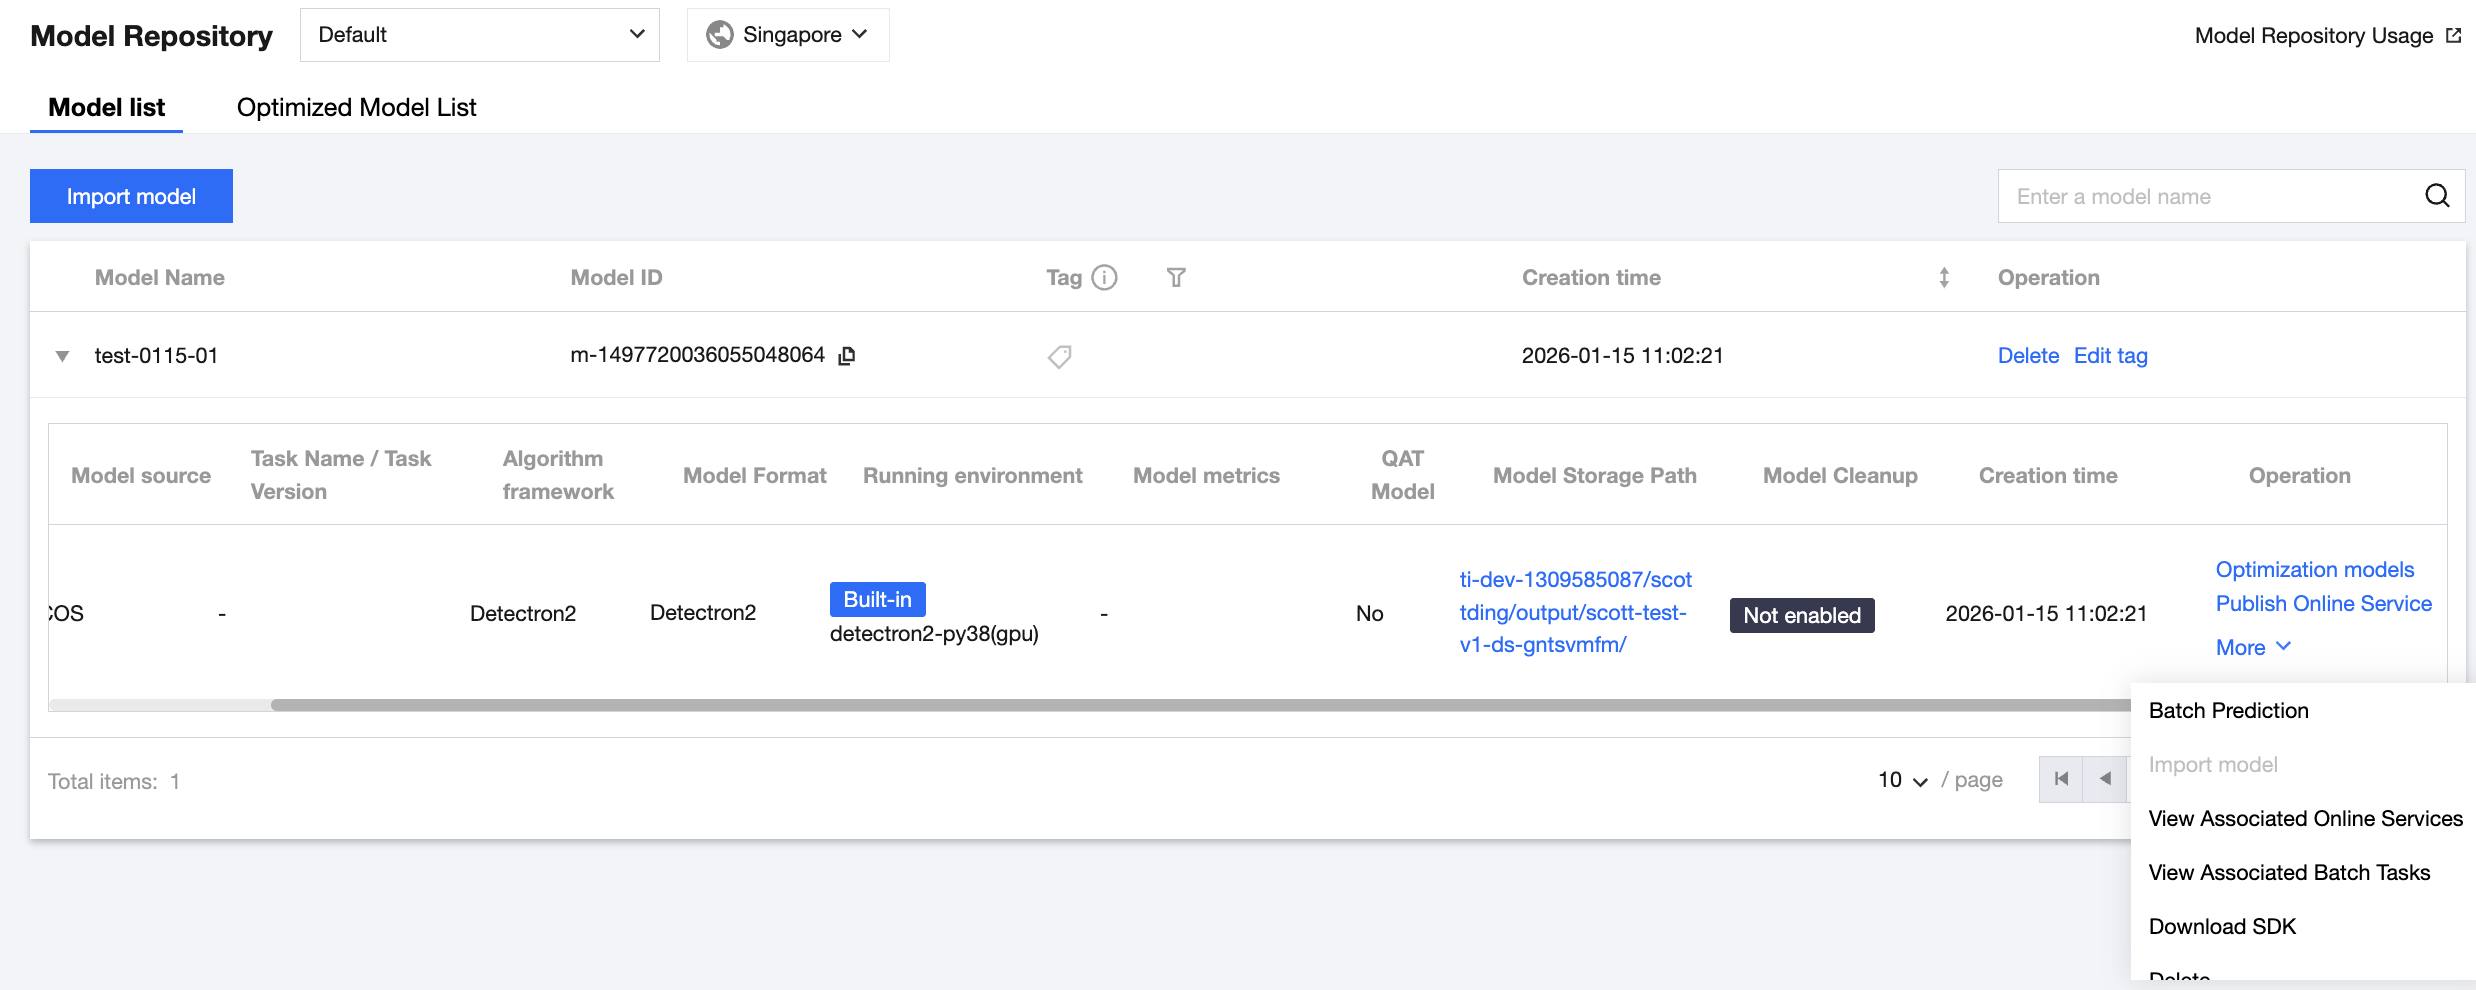
The Model Repository lists display models and their corresponding versions, allowing you to perform operations such as releasing online services. The Model Repository lists are divided into the model list and the optimized model list. The model list displays the original models you uploaded, while the optimized model list displays the optimized models saved after model optimization.
You can click Delete to delete a model and its corresponding version.
You can click Edit Tag to edit a model tag.
You can click Optimization Models for a model version to redirect to the task creation page of Model Optimization to optimize the model version.
You can click Publish Online Services for a model version to redirect to the service creation page of Model Services to release and package the current model service.
You can click Batch Predictions for a model version to redirect to the task creation page of Batch Predictions for batch predictions.
You can click Import Model for a model version to add directories and sub-versions under the directory of the current model version. Currently, this feature only supports importing sub-versions for the Savedmodel format, mainly used for hot updates in TensorFlow Serving.
You can click View Associated Online Services to view the model services associated with a model version and their statuses.
You can click View Associated Batch Tasks to view the batch tasks associated with a model version and their statuses.
You can click Download SDK to open COSBrowser for downloading. You need to install the COSBrowser client first.
You can click Delete to delete a model version. Note that the deleted versions cannot be recovered, model versions that have been associated with service groups and whose services are running cannot be deleted, and model versions that have been associated with batch prediction tasks and whose tasks are running cannot be deleted. Before deletion, you can click View Associated Service Groups or View Associated Batch Tasks to check whether the deletion operation can be performed.
Importing a Model
Choose Model Management > Model Repository, and click Import Model to start importing a model.
Importing a New Model
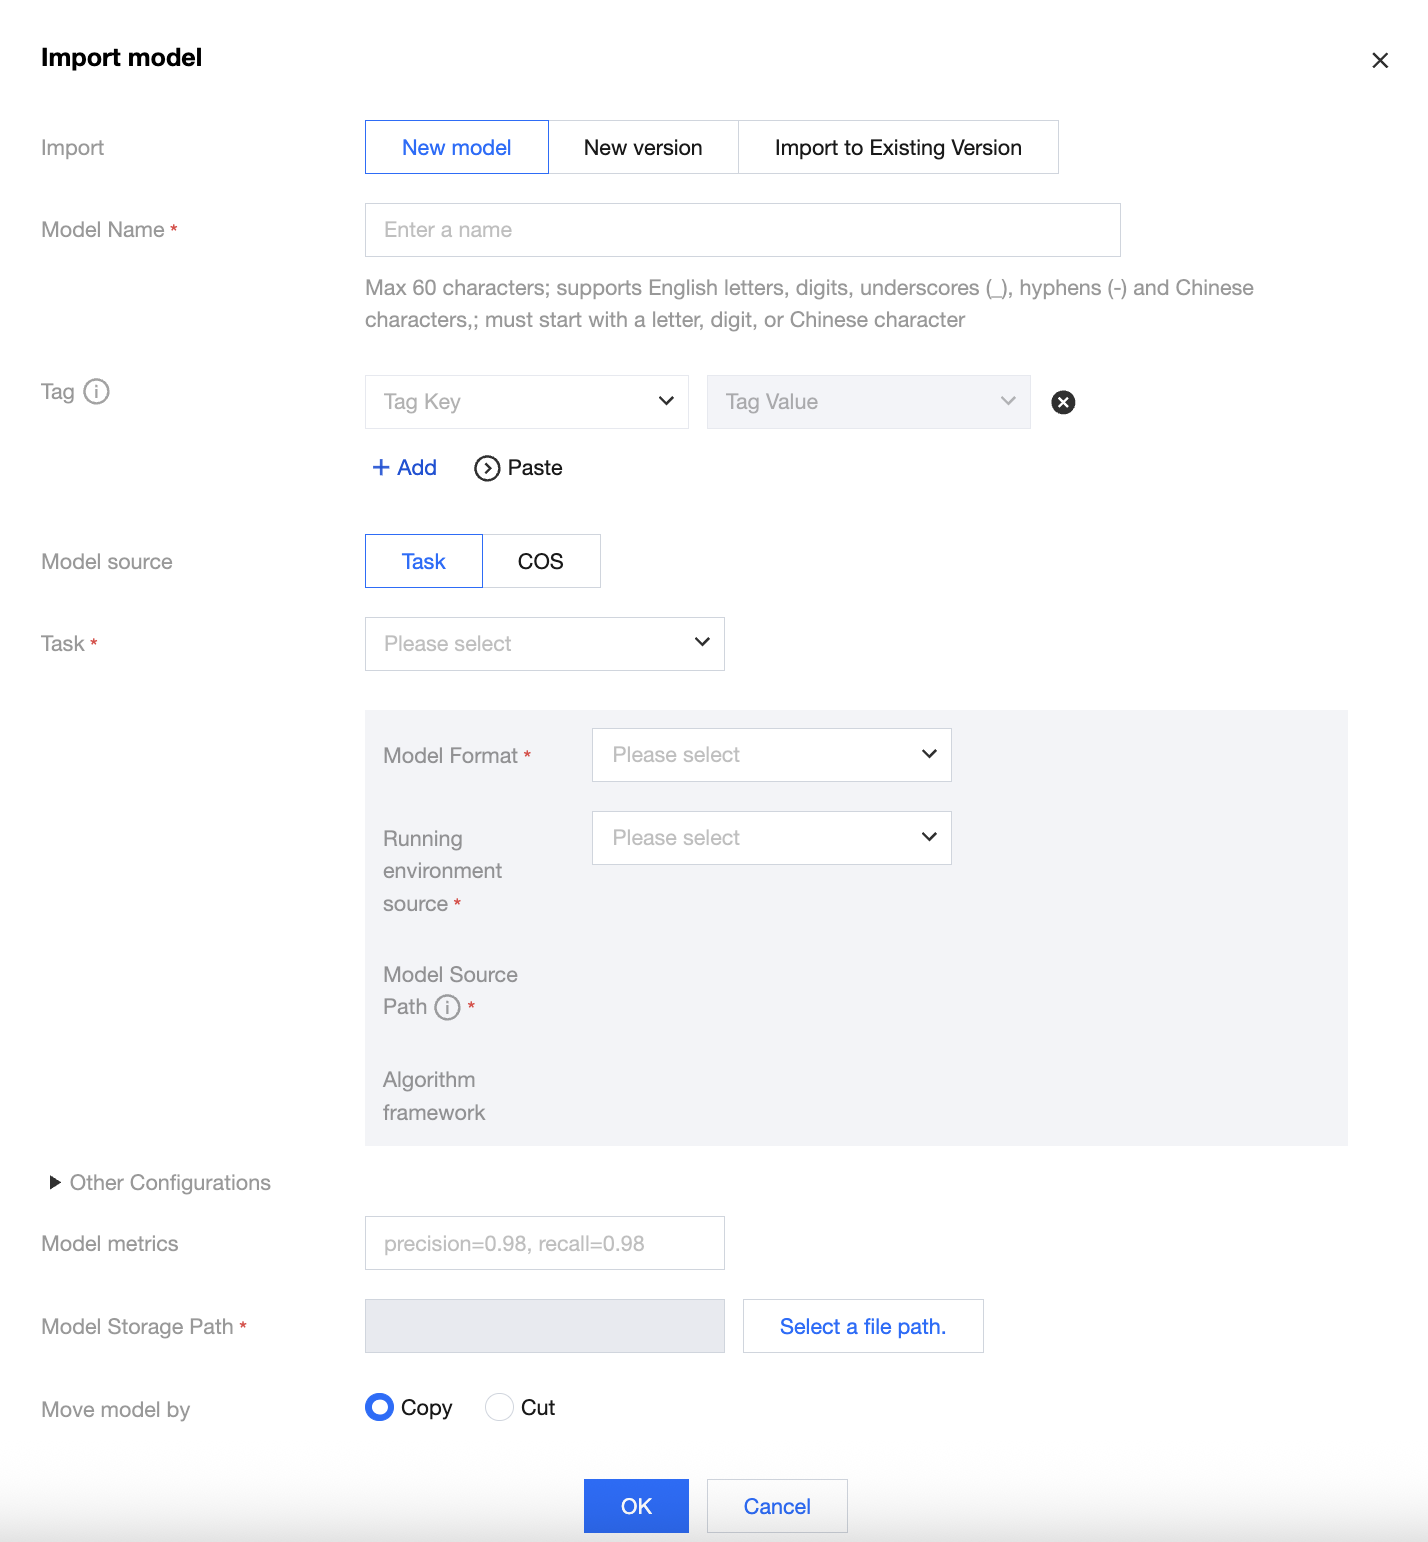
1. Enter the model name and configure a custom tag as required. (Tags are used to categorize resources from different dimensions. You need to configure Tag Settings first in the console. You can also click Usage Guide for Tag Management to view tag settings.) 2. Import a model from a task:
Select the name of the training task.
After selecting the training task, select the corresponding model format. If the task has the corresponding algorithm framework, model source path, and model metric information, they will be automatically populated. Note that the populated model metric information is the latest reported metric information.
Select the built-in running environment or pull a running environment from Tencent Container Registry (TCR) through custom selection. Currently, optimized models can only be run in the built-in running environment.
The model file of this task will be automatically obtained. You can process the model file by cutting or copying. After processing, the COS path will be automatically generated for you.
3. Import a model from COS:
Select a model format. Currently, supported model formats include Savedmodel, Frozen Graph, TorchScript, Detectron2, PyTroch native, PMML, ONNX, MMDetection, and Hugging Face.
Enter the desired model metrics corresponding to the model you want to upload.
Select a built-in running environment or pull a running environment from TCR through custom selection. If you select a built-in running environment, you need to select the corresponding model format mentioned above.
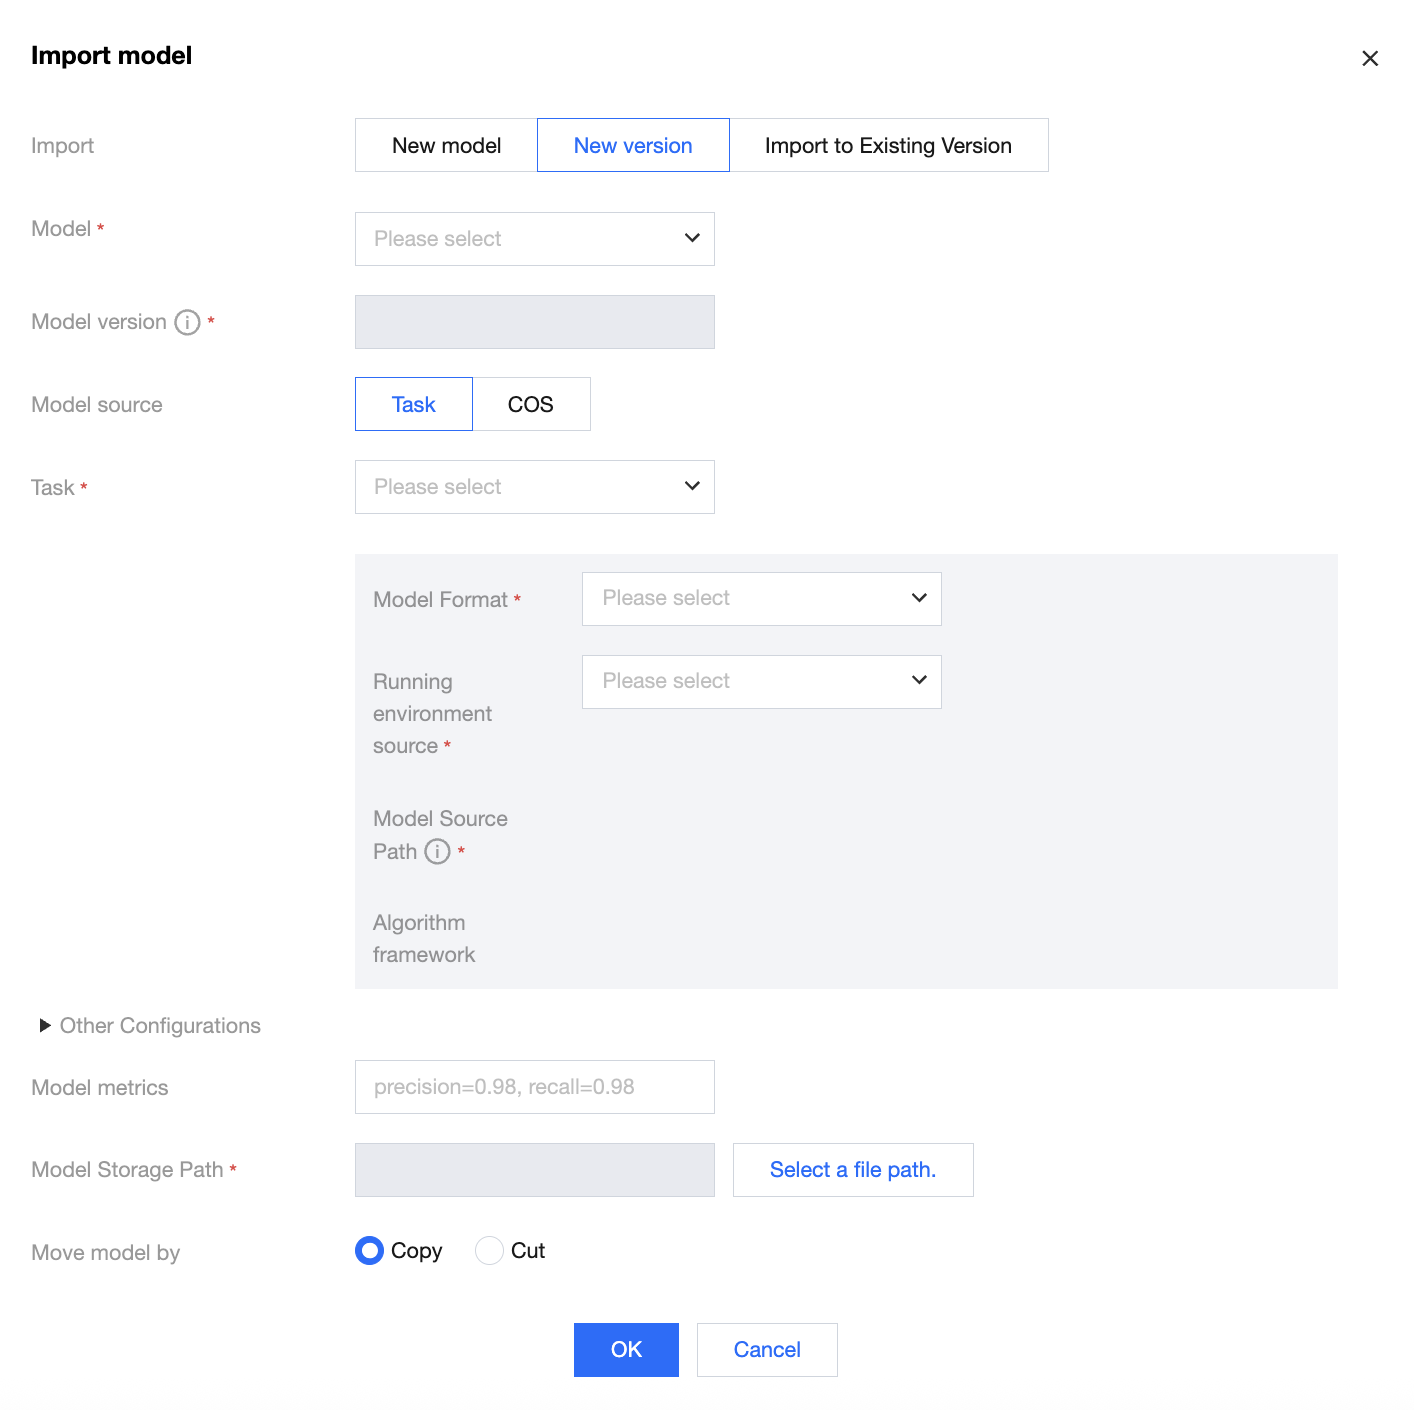
Importing a New Version
1. Select a model and import its new version. The model version number will automatically increase by 1 based on the existing highest version number, for example, V2 or V3.
2. Import a model from a task:
Select the name of the training task.
After selecting the training task, select the corresponding model format. If the task has the corresponding algorithm framework, model source path, and model metric information, they will be automatically populated. Note that the populated model metric information is the latest reported metric information.
Select the built-in running environment or pull a running environment from Tencent Container Registry (TCR) through custom selection. Currently, optimized models can only be run in the built-in running environment.
The model file of this task will be automatically obtained. You can process the model file by cutting or copying. After processing, the COS path will be automatically generated for you.
3. Import a model from COS:
Select a model format. Currently, supported model formats include Savedmodel, Frozen Graph, TorchScript, Detectron2, PyTroch native, PMML, ONNX, MMDetection, and Hugging Face.
Enter the desired model metrics corresponding to the model you want to upload.
Select a built-in running environment or pull a running environment from TCR through custom selection. If you select a built-in running environment, you need to select the corresponding model format mentioned above.
After completing the above configurations, click OK. The model is successfully imported.
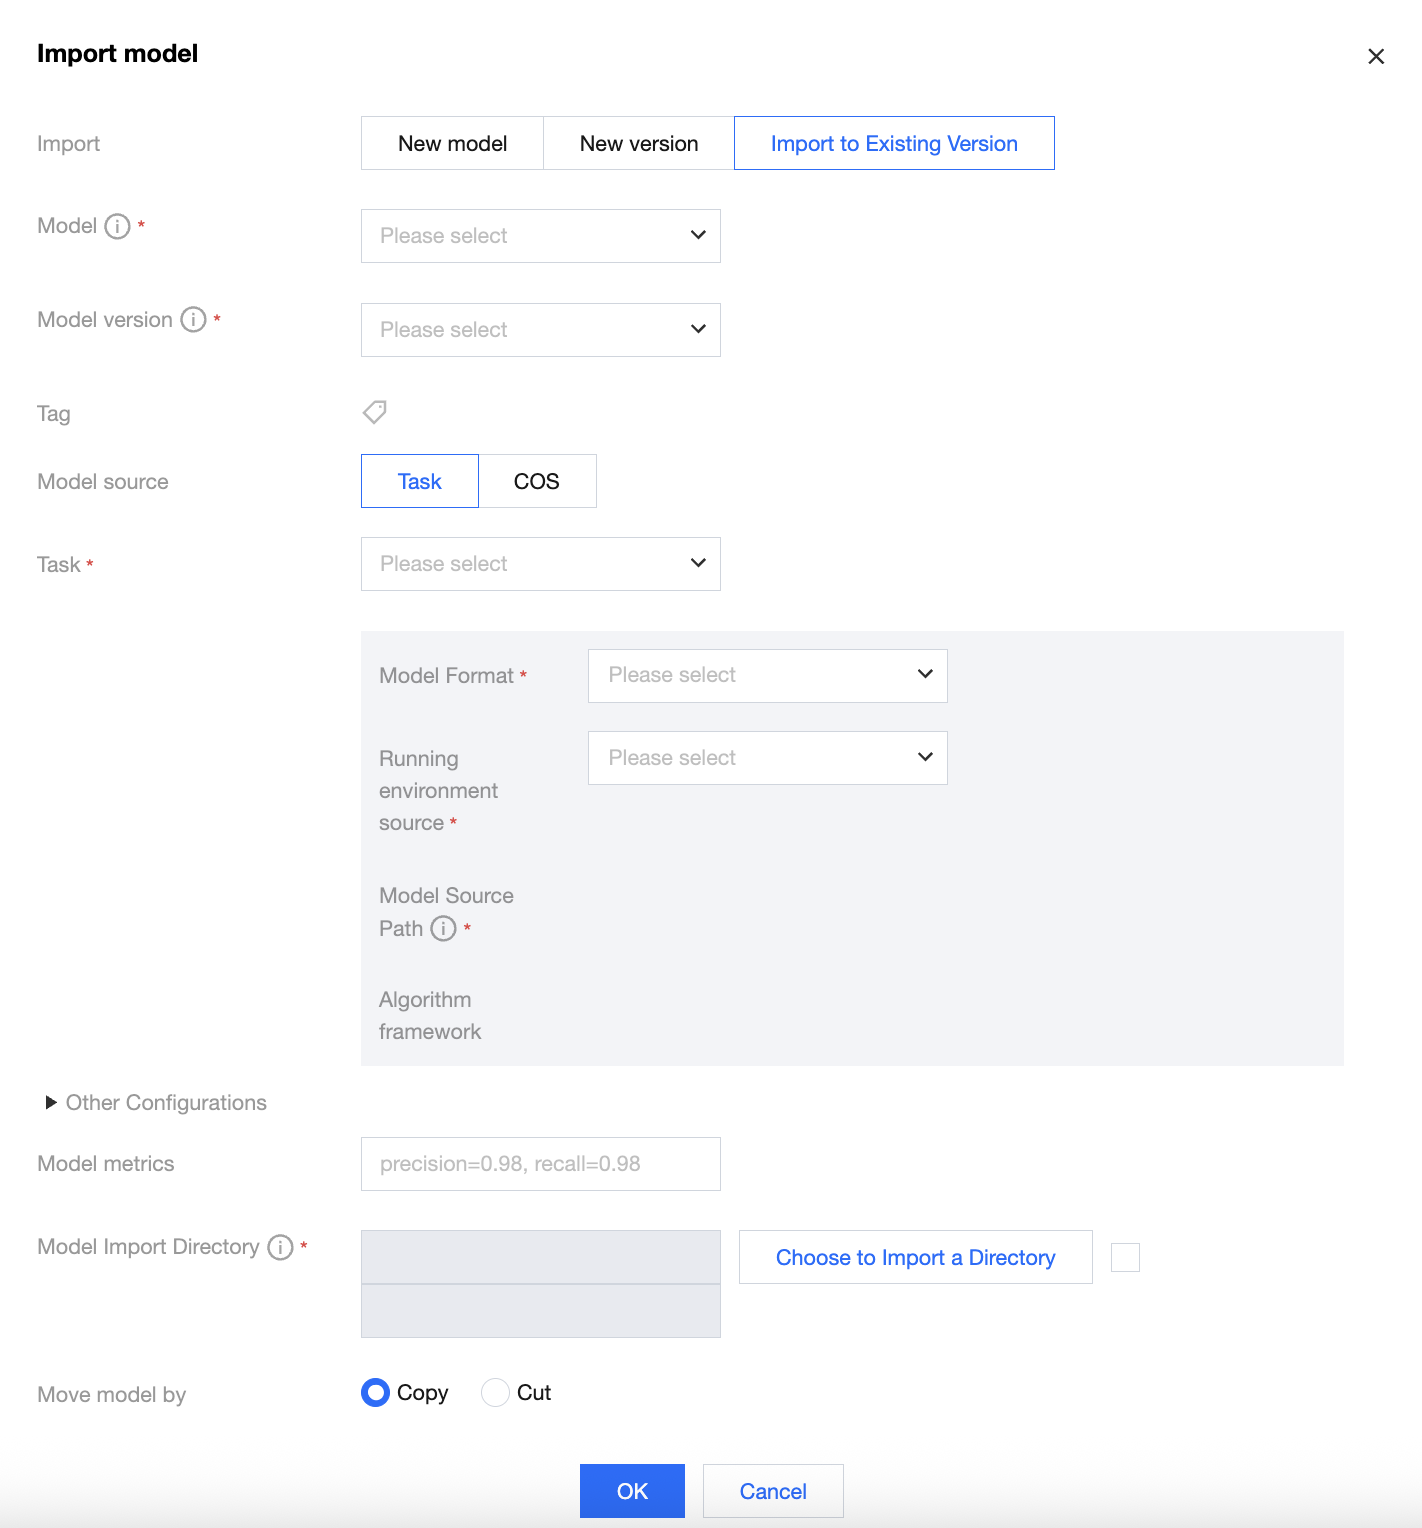
Importing a Model to the Current Version
1. Select a model version and import its sub-version. Currently, only the Savedmodel format is supported, mainly used for hot updates in TensorFlow Serving. You can select models in the Savedmodel format and their versions existing in the model list.
2. Import a model from a task:
Select the name of the training task for the model in the Savedmodel format.
After the training task is selected, if the task has the corresponding algorithm framework, model source path, and model metric information, they will be automatically populated. Note that the populated model metric information is the latest reported metric information.
Select the built-in running environment or pull a running environment from Tencent Container Registry (TCR) through custom selection. Currently, optimized models can only be run in the built-in running environment.
The model import directory is the storage directory appended under this model version. This directory must be the main directory of the model version or its sub-directory, and you can also choose to append a directory for the sub-version to the model version directory. The platform will automatically generate a new directory based on the timestamp, and you can choose whether to select this directory as needed.
After model cleanup is enabled, the platform will search for the model directory under the model storage path corresponding to the model version, and retain the latest N models in the model directory based on the configured upper limit for the number of retained models.
The model file of this task will be automatically obtained. You can process the model file by cutting or copying. After processing, the COS path will be automatically generated for you.
3. Import a model from COS:
Select a model format. Currently, only the Savedmodel format is supported.
Select a built-in running environment or pull a running environment from TCR through custom selection. If you select a built-in running environment, you need to select the corresponding model format mentioned above.
Select a model source path. You need to select the folder corresponding to the sub-version of the model you want to import.
Enter the desired model metrics corresponding to the model you want to upload.
The model import directory is the storage directory appended under this model version. This directory must be the main directory of the model version or its sub-directory, and you can also choose to append a directory for the sub-version to the model version directory. The platform will automatically generate a new directory based on the timestamp, and you can choose whether to select this directory as needed. All files in the selected model source path will be copied or pasted to the model import directory.
After model cleanup is enabled, the platform will search for the model directory under the model storage path corresponding to the model version, and retain the latest N models in the model directory based on the configured upper limit for the number of retained models.
All files in the selected model source path will be copied or pasted to the model import directory based on the model movement method you selected.
After completing the above configurations, click OK. The model is successfully imported into the existing version.
Model Optimization
In the Model Optimization module, you can perform inference acceleration on the models in the original model list. To perform inference acceleration on models, see Model Optimization. Publishing an Online Service
In the model version operations corresponding to the original model list, you can click Publish Online Service for an original model to perform service release packaging operations. In the model version operations corresponding to the original model list, you can also click Publish Online Service for an optimized model to perform service release packaging operations. For subsequent detailed steps, see Online Services to deploy and use models.