命名空间管理
Download
聚焦模式
字号
操作场景
命名空间是 TDMQ RocketMQ 4.x 虚拟集群和专享集群中的一个资源管理概念。用户不同的业务场景一般都可以通过命名空间做隔离,并且针对不同的业务场景设置专门的配置。不同命名空间之间的 Topic 相互隔离,订阅相互隔离,角色权限相互隔离。
本文档指导您使用消息队列 TDMQ RocketMQ 版时,创建多个命名空间,以便在同一个集群下将 TDMQ RocketMQ 版应用于不同的场景。
约束与限制
仅 4.x 虚拟集群和专享集群需要创建命名空间,5.x 集群和 4.x 专享集群无需创建。
每个集群下最多可以创建10个命名空间。
同一个命名空间下的 Topic 和 Group 的名称唯一。
消息成功生产后,默认在服务端保留3天,无论是否被消费,到时间则自动删除。专享集群可以 提交工单 申请调整消息保留时间。
操作步骤
创建命名空间
1. 登录 TDMQ RocketMQ 版控制台,选择地域后,单击目标集群的 “ID”,进入基本信息页面。
2. 在页面上方选择命名空间页签,单击新建进入创建命名空间页面。
3. 在新建命名空间对话框,设置命名空间的相关属性配置。
命名空间名称:设置命名空间的名称(创建后不可修改),3-32个字符,只能包含字母、数字及'_'
命名空间描述:命名空间的备注说明
4. 单击提交完成所在集群命名空间的创建。
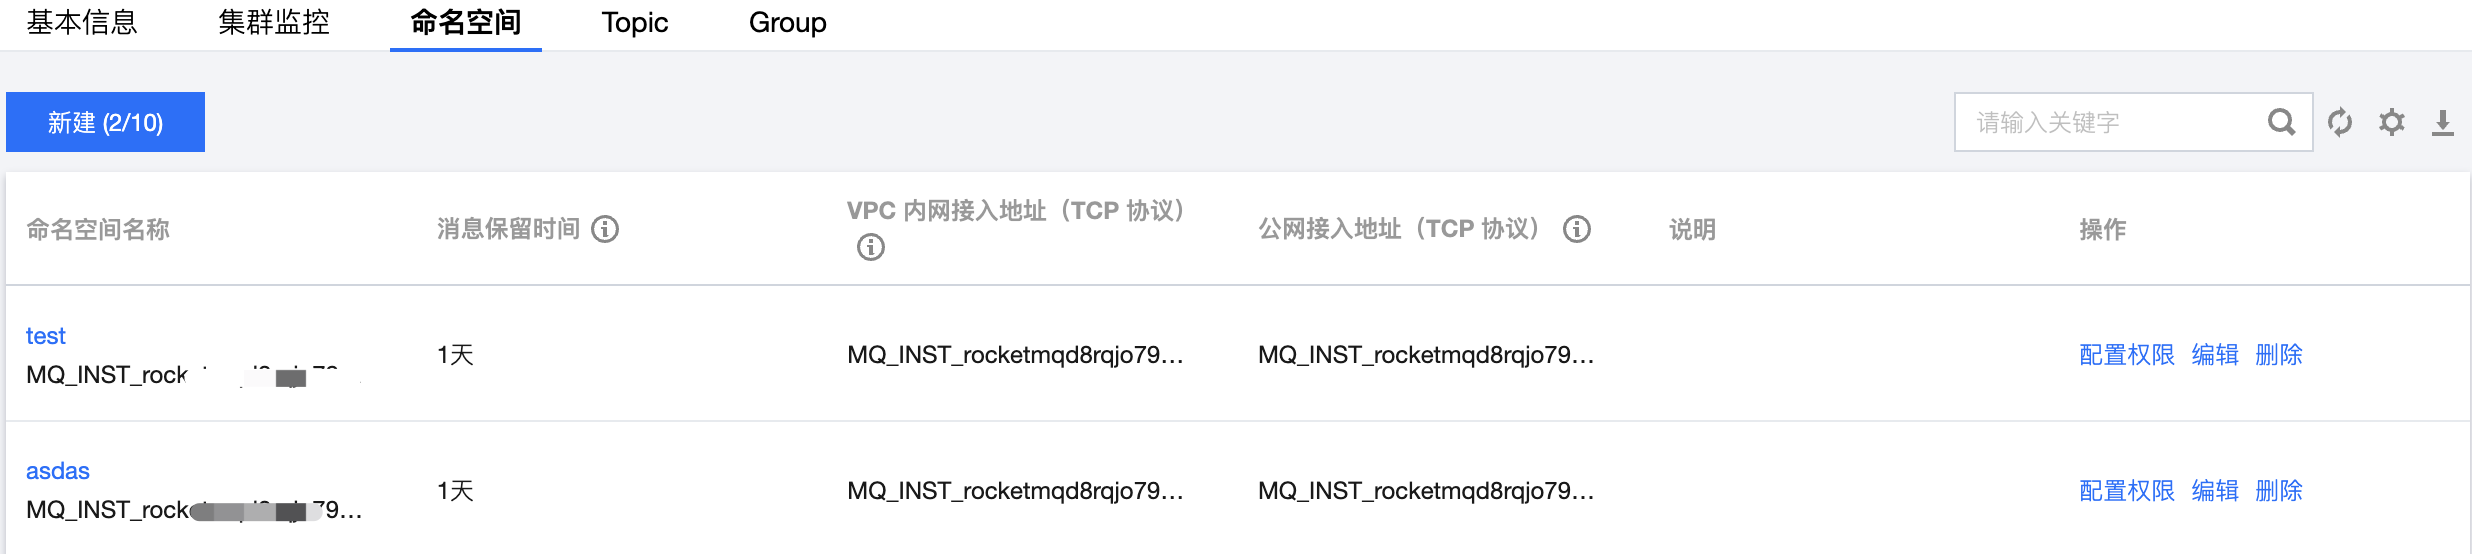
获取接入地址
在命名空间列表页,在 VPC 内网接入地址和公网接入地址栏可获取命名空间的 TCP 协议接入地址,HTTP 协议的接入点请前往集群基本信息页查看。
修改命名空间
如果需要重新修改编辑,可以通过以下步骤操作:
1. 在命名空间列表页,单击操作列的编辑,进入编辑页面。
2. 修改命名空间说明,单击保存完成修改。
删除命名空间
如果想删掉创建的命名空间,可以通过以下步骤操作:
1. 在命名空间列表页,单击操作列的删除。
2. 在删除的确认弹框中,单击删除,即可删除命名空间。
说明:
为了避免用户的误操作造成集群内部数据(例如 Topic 和 Group 等),在删除命名空间时,控制台会对命名空间内的资源进行校验,如果存在资源未删除,如 Topic 或者 Group 未删除,则无法删除命名空间。
在删除命名空间时,请先删除命名空间内的 Topic 和 Group,目前均已支持控制台批量删除。删除命名空间前,还需要删除命名空间的绑定角色。在命名空间列表页,单击配置权限。
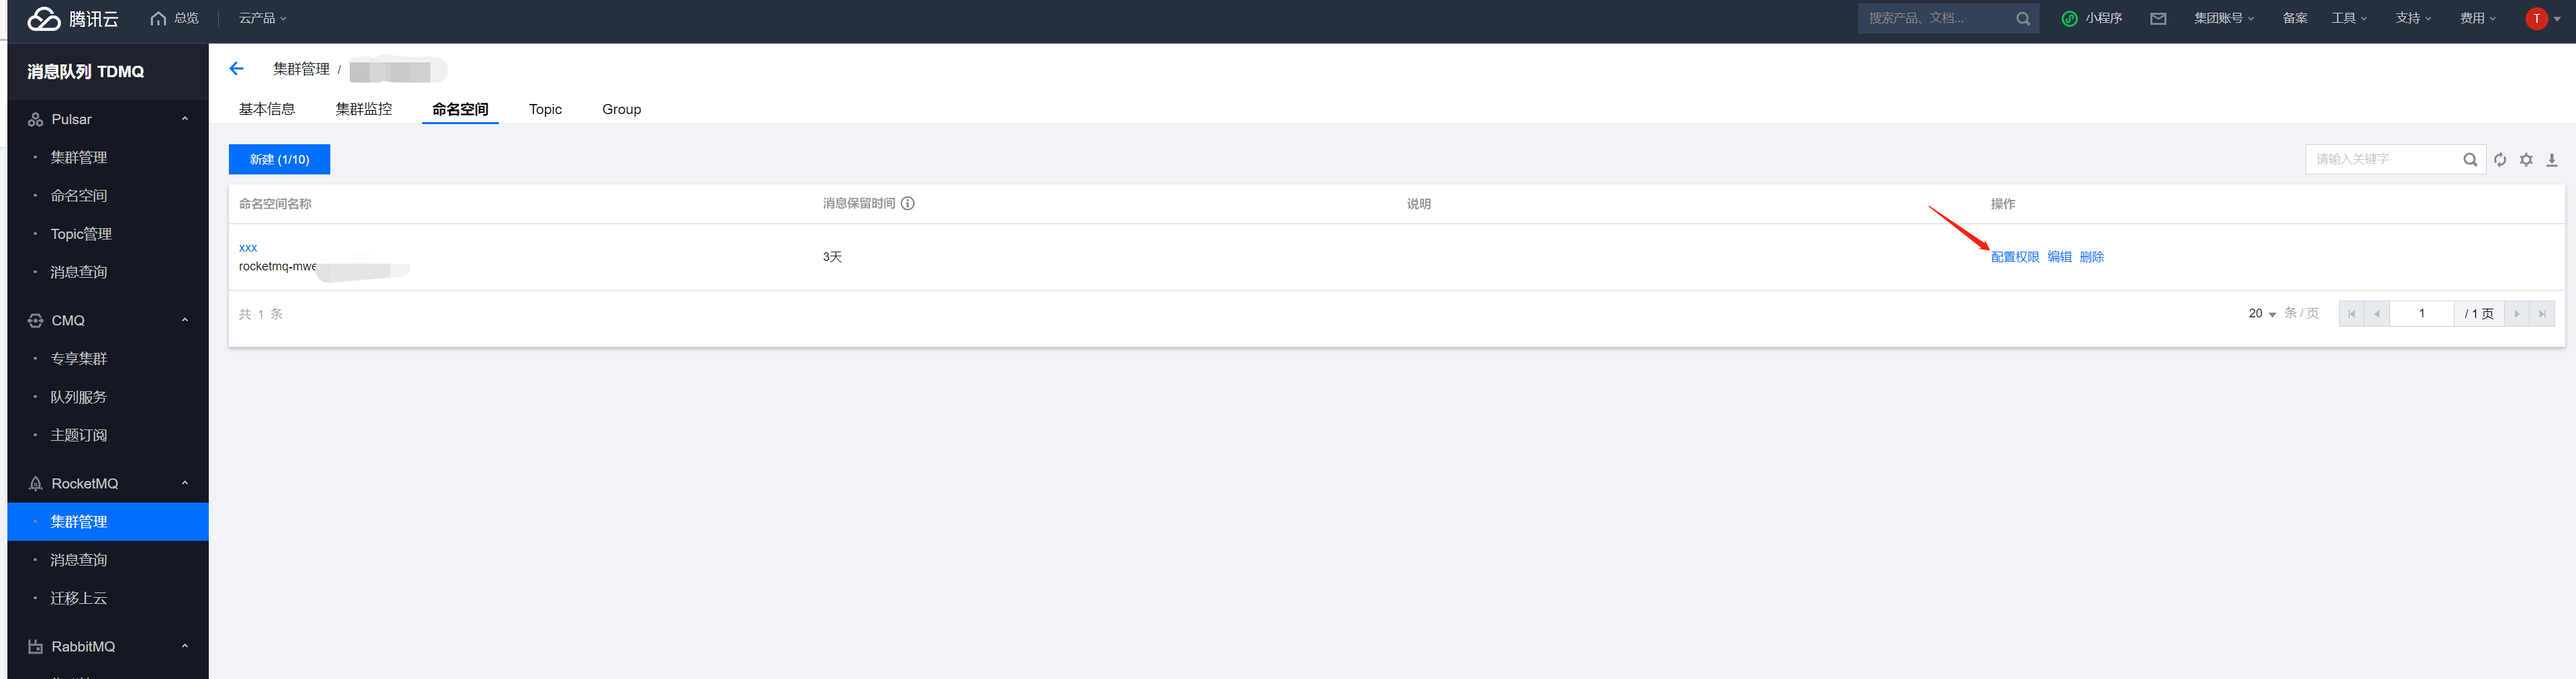
进入权限配置页面后,单击删除后,解除两者的绑定关系,之后可以再次前往命名空间页,删除命名空间。
文档反馈