To associate a private domain of account A with a VPC of account B, you need to authorize account A first. This document describes how to associate VPCs of another account.
Prerequisites
You have already created a private domain. If you haven't, see Creating Private Domain to create one.
Directions
Step 1: use account B to authorize account A via a role.
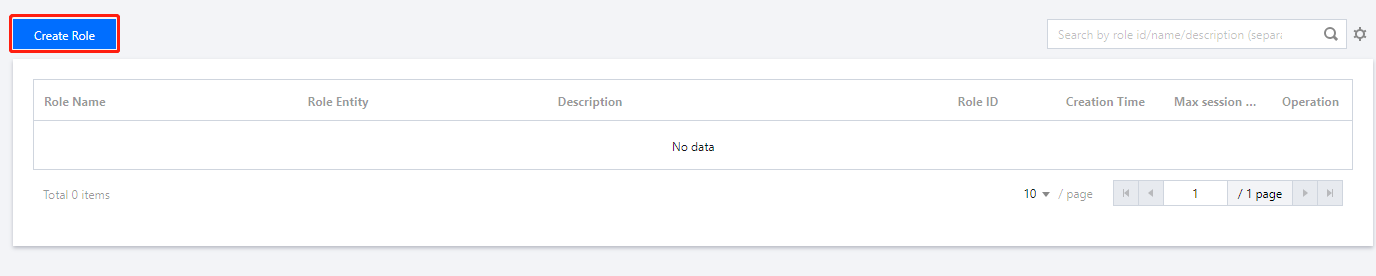
1. Log in to the CAM console with account B, go to the Roles page, and click Create Role, as shown below:
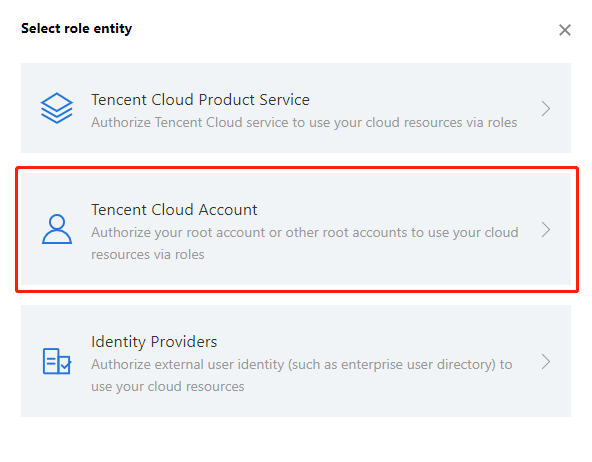
2. In the Select role entity dialog box, click Tencent Cloud Account, as shown below:
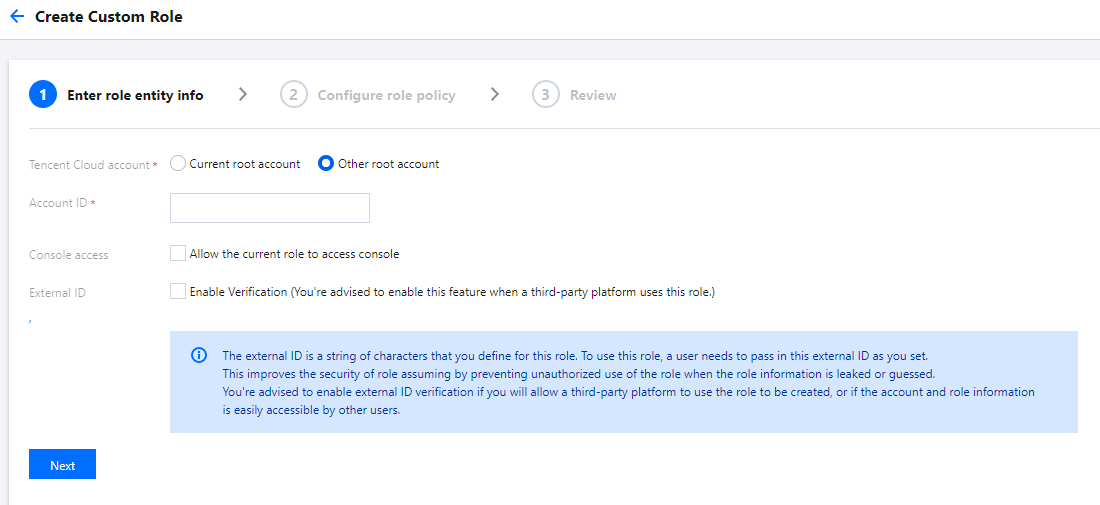
3. In the Create Custom Role page, enter relevant information and click Next, as shown below:
Tencent Cloud account: select Other root account.
Account ID: enter the account ID of account A.
External ID: not checked by default.
Console access: not checked by default.
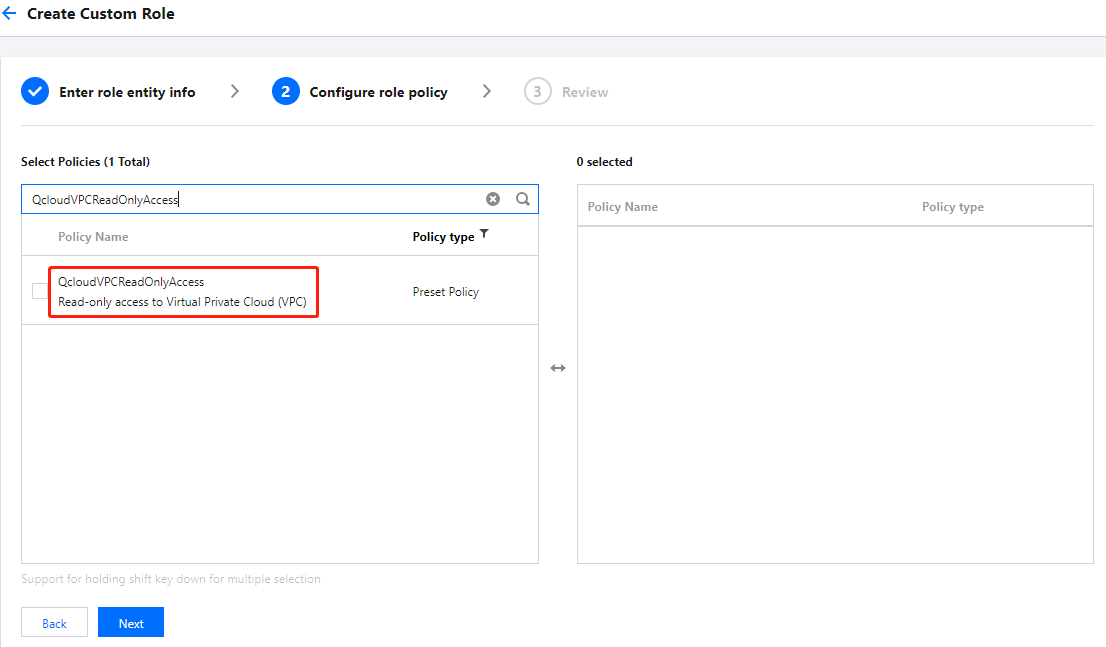
4. In the Configure role policy step, search for and select the QcloudVPCReadOnlyAccess policy and click Next, as shown below:
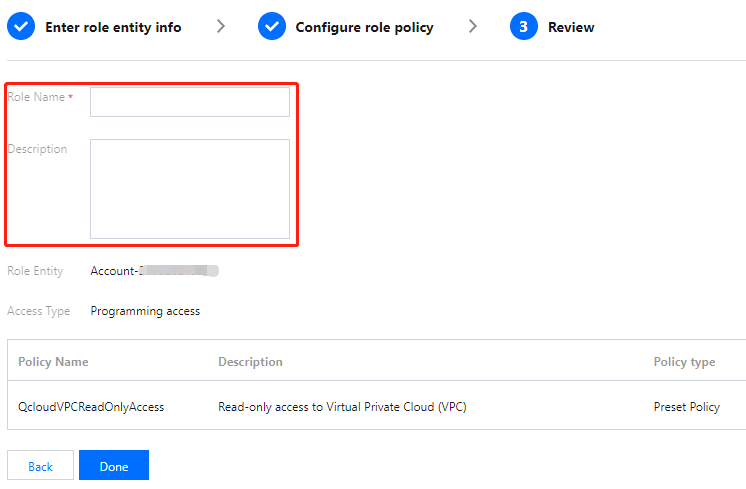
5. In the Review step, enter relevant information, as shown below:
Role Name: enter PRIVATEDNS_ACCOUNT_<authorized UIN>, e.g., PRIVATEDNS_ACCOUNT_88888888.
Description: enter the description.
6. Click Done to complete the authorization.
Step 2: use account A to add account B as an associated account.
1. Log in to the Private DNS console with account A and go to the Private Domain List page.
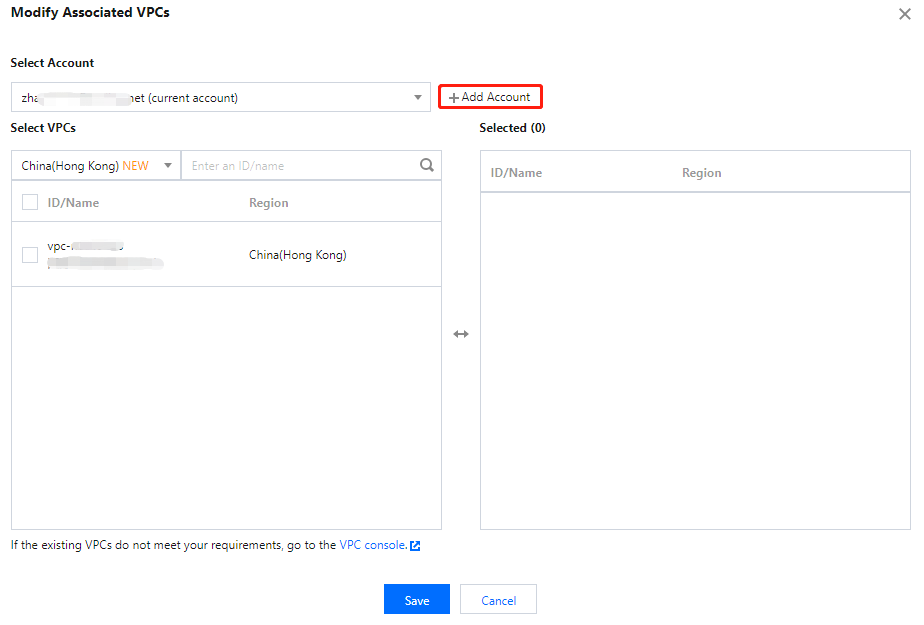
2. In the private domain list, click Associate VPCs on the right of the private domain you want to authorize, as shown below:
3. In the Modify Associated VPCs dialog box, click Add Account, as shown below:
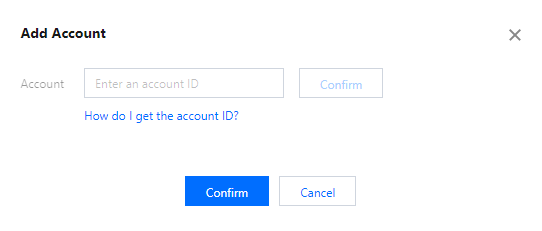
4. In the Add Account dialog box, enter the account ID of account B and click Confirm, as shown below:
5. After adding account B successfully, you can associate or modify the VPCs of both account A and account B.