In TEM, an environment is a collection of computing, network, and storage resources. TEM provides the multi-environment management feature. You can create multiple isolated environments for development, testing, prerelease, and production according to your business needs and deploy applications separately. In this way, applications are isolated by environment, and those in the same environment can access each other through the Service mechanism in K8s or registries like ZooKeeper.
This document describes how to create an environment in the TEM console.
Directions
1. Log in to the TEM console and click Manage Environment on the left sidebar.
2. On the Manage Environment page, select a deployment region and click Create.
Note:
You can create up to five environments in the same region.
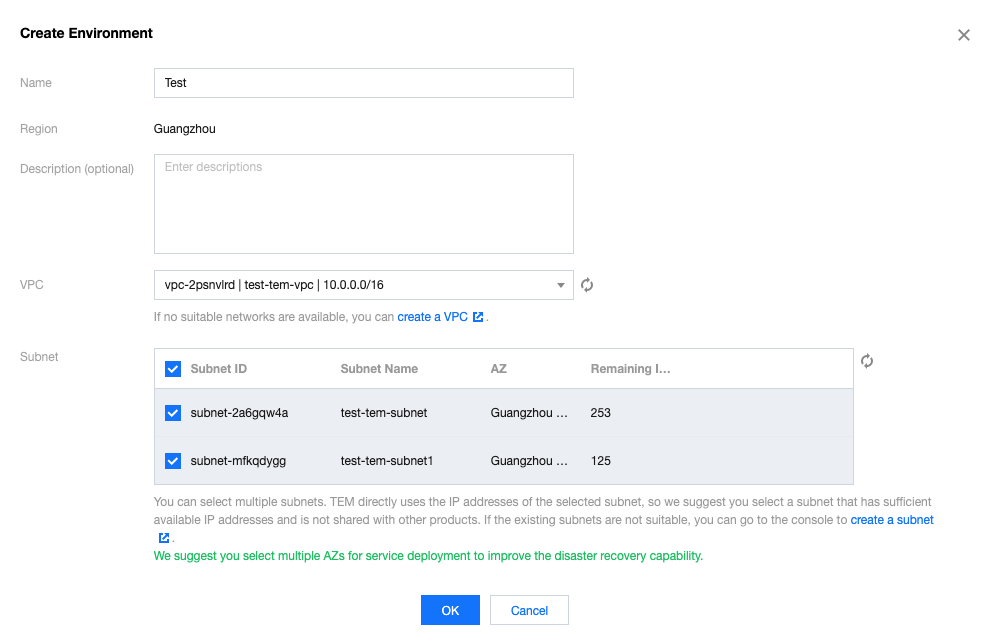
3. In the Create environment window, configure the environment information.
Name: enter up to 40 characters.
VPC: Select an existing VPC. If your existing VPCs are not suitable or you haven't created a VPC yet, you can click Create VPC to create one (note that the selected region must be the same as that of the environment), return to and refresh this page, and select it.
Subnet: Select an existing subnet. We recommend you choose multi-AZ deployment to improve the disaster recovery capabilities. If your existing subnets are not suitable or you haven't created a subnet yet, you can click Create Subnet to create one, return to and refresh this page, and select it.
CoreDNS is automatically deployed to support service discovery in the environment. Specifically, two replica nodes of Deployment:coredns are automatically deployed in the Kubernetes cluster namespace kube-system. This service is free of charge, and we recommend you not modify it.
4. Click OK and the environment will enter the initialization status. Wait a few minutes, and the environment will be created.