账号管理
Download
聚焦模式
字号
说明:
Live 和即时通信 IM 共用同一套账号系统。
新建账号
1. 在账号管理页面,单击新建账号。
2. 在弹出的新建账号对话框中,配置以下参数:
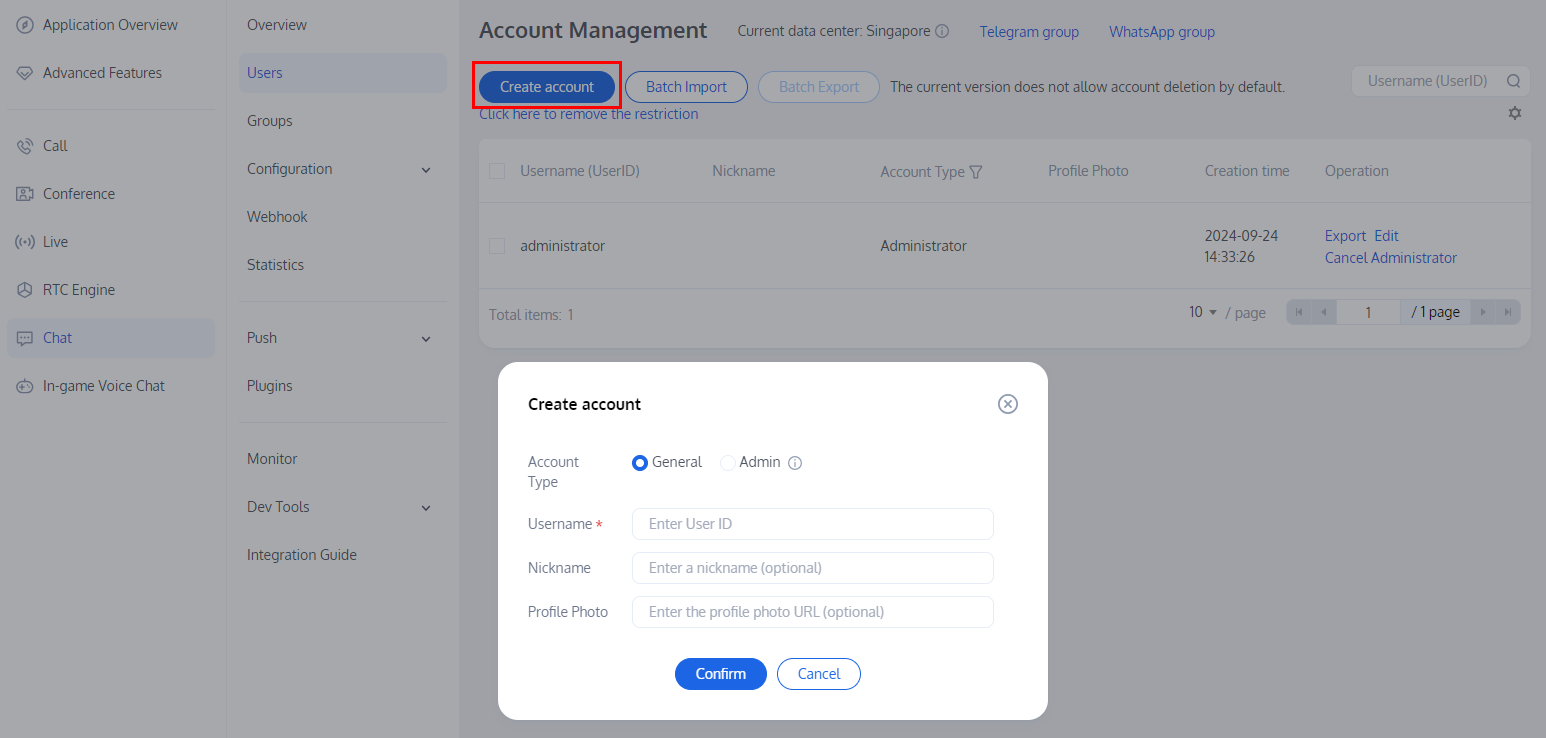
账号类型:区分普通账号和管理员账号。“App管理员”是对 App 具有最高管理权限的角色,可调用 REST API 接口,进行创建/解散群组、发送全员推送消息等操作。每个应用最多支持配置 10 个管理员。
用户名:需输入用户名(UserID),必填。
用户昵称:可输入用户昵称,非必填。
头像:可输入用户头像链接 URL,非必填。
3. 单击确定保存配置。
4. 账号新建完成后,在账号列表中可以查看用户名、昵称、账号类型、头像和创建时间。
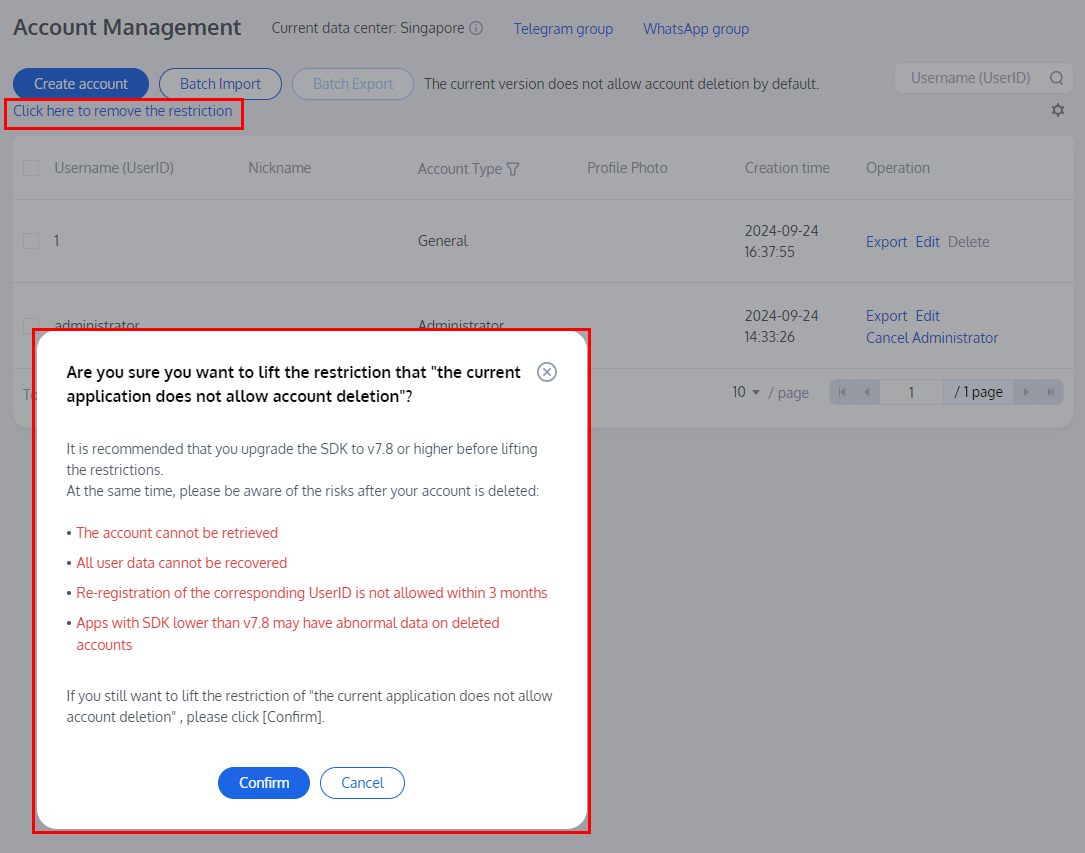
删除账号
1. 默认不允许删除账户。解除限制后可删除账户。点击 Click here to remove the restriction,在弹出的确认对话框中,了解相关风险后,点击确认解除限制。
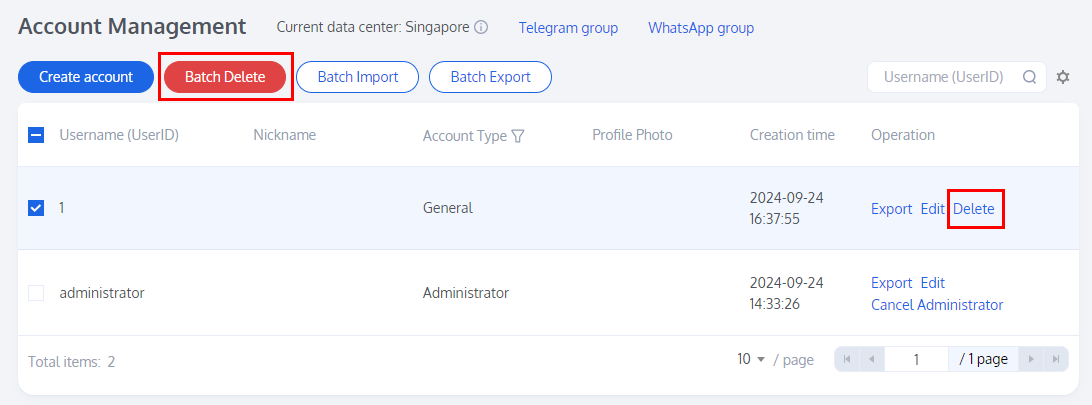
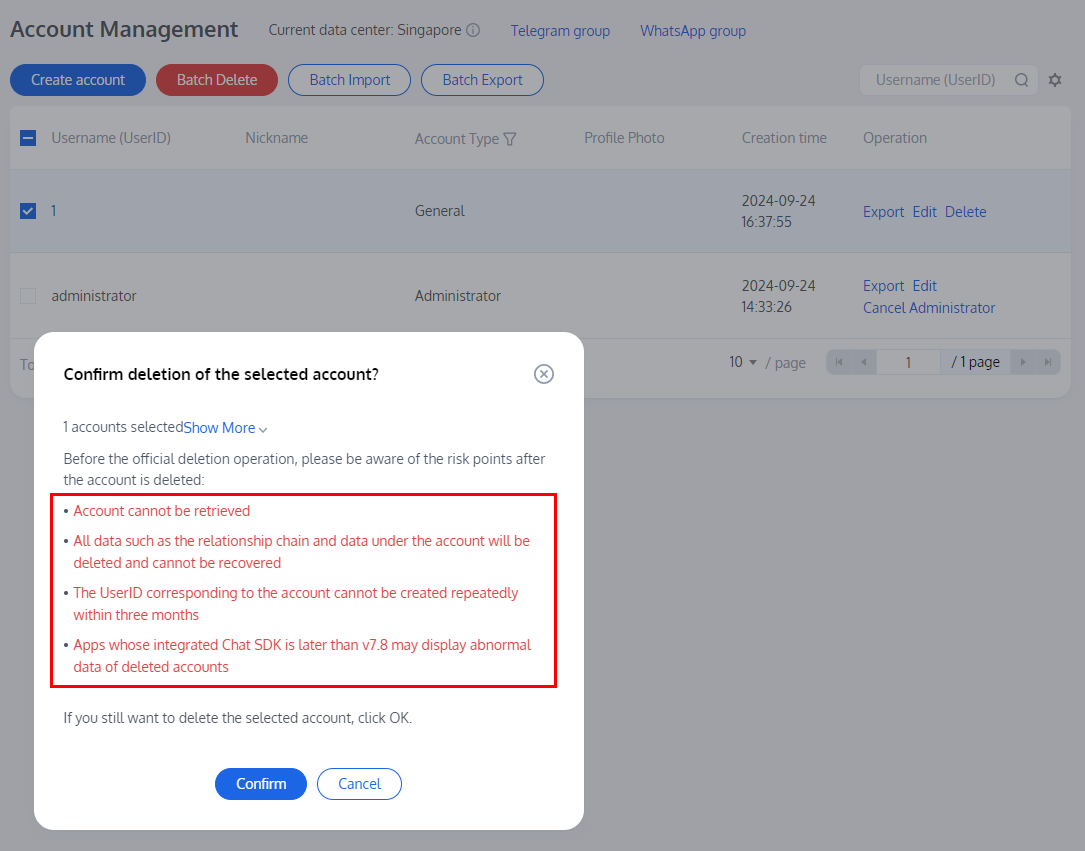
2. 在账号管理页面,在列表中选中需要删除的账号,单击批量删除。
3. 在弹出的确认对话框中,了解相关风险后,点击确认删除账户。删除后数据无法恢复,请谨慎操作。
编辑账号
1. 在账号管理页面,在列表中希望编辑的账号操作列,单击编辑。
2. 在弹出的编辑账号对话框中,配置以下参数:
用户名:不可编辑。
昵称:可编辑用户昵称,非必填。
账号类型:不可编辑。
性别:可编辑性别,非必填。
生日:可编辑生日,非必填。
所在地:可编辑所在地,非必填。
个性签名:可编辑个性签名,非必填。
加好友验证方式:可编辑加好友验证方式。
语言:可编辑语言,非必填。
头像:可编辑头像,非必填。
消息设置:可选择消息设置选项,非必选。
管理员禁止加好友标识:可配置管理员禁止加好友标识,非必选。
等级:可编辑等级,非必填。
角色:可编辑角色,非必填。
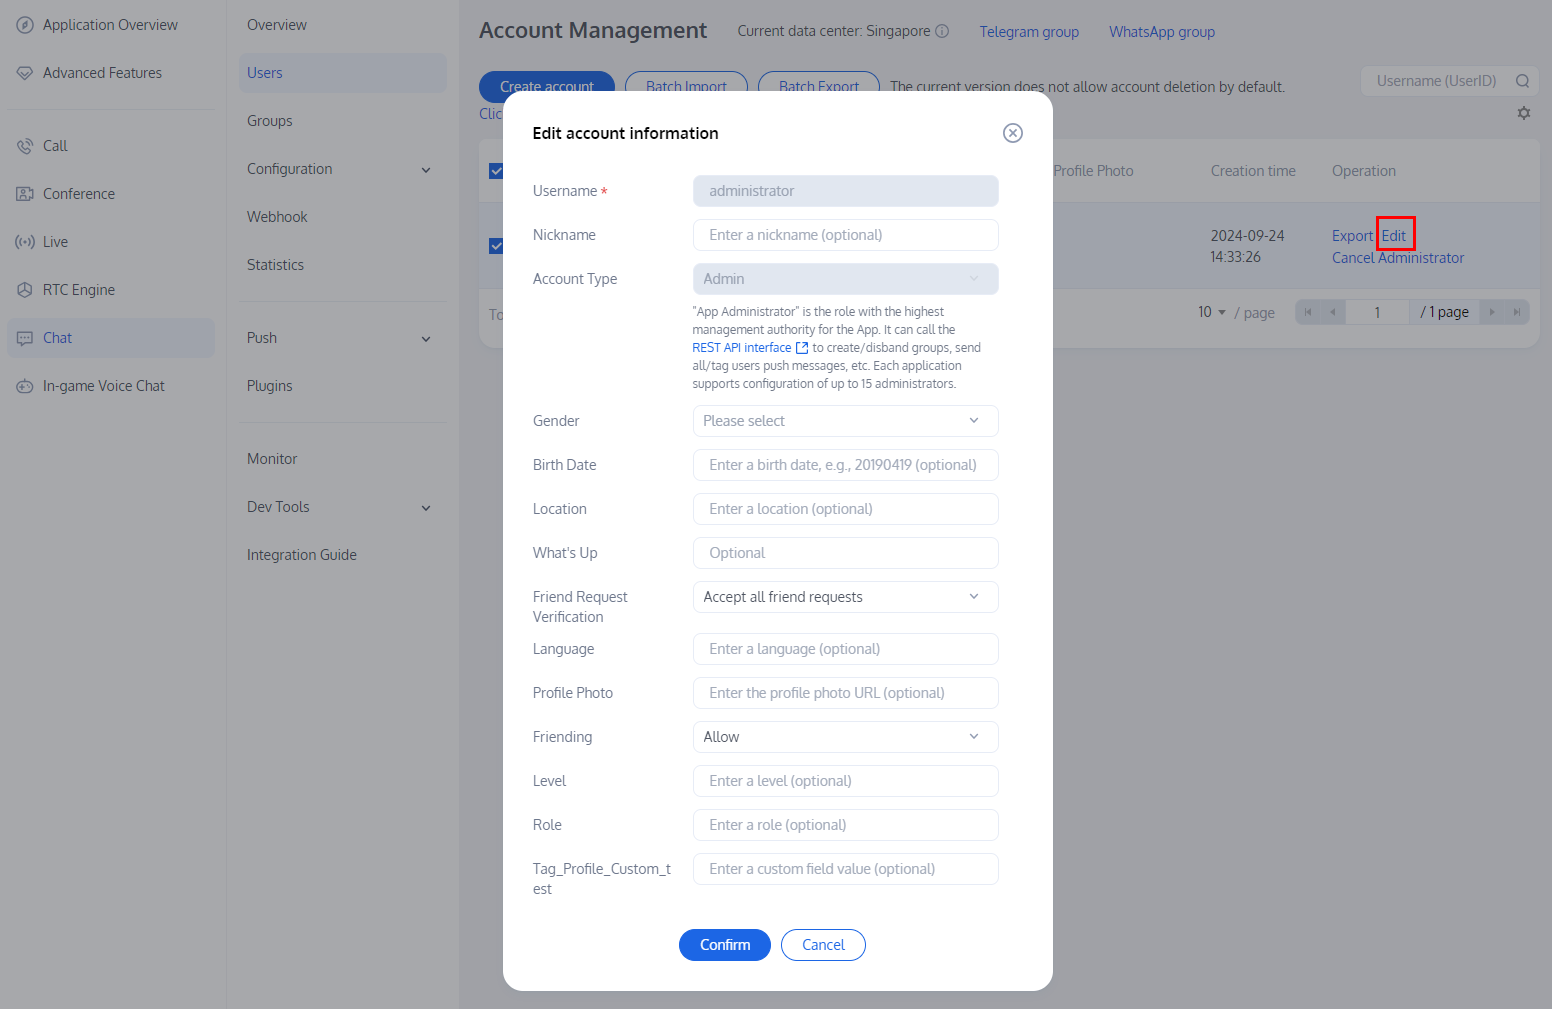
3. 单击确定保存配置。
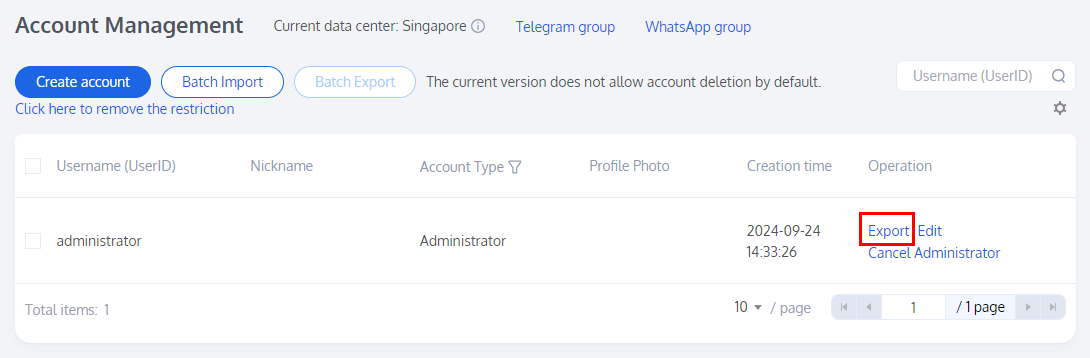
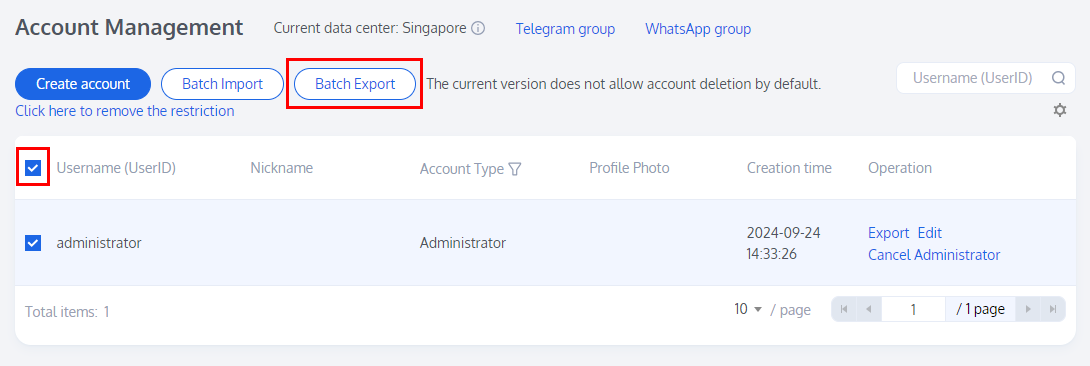
导出账号
1. 单独导出:在账号管理页面,在列表中希望导出的账号操作列,单击导出。
2. 批量导出:在账号管理页面,在列表中选中需要导出的账号,单击批量导出。
3. 在弹出的导出对话框中提示导出成功后,单击下载,即完成导出。

文档反馈